The configuration parameters of the authorization models available in Zorp are described in this section.
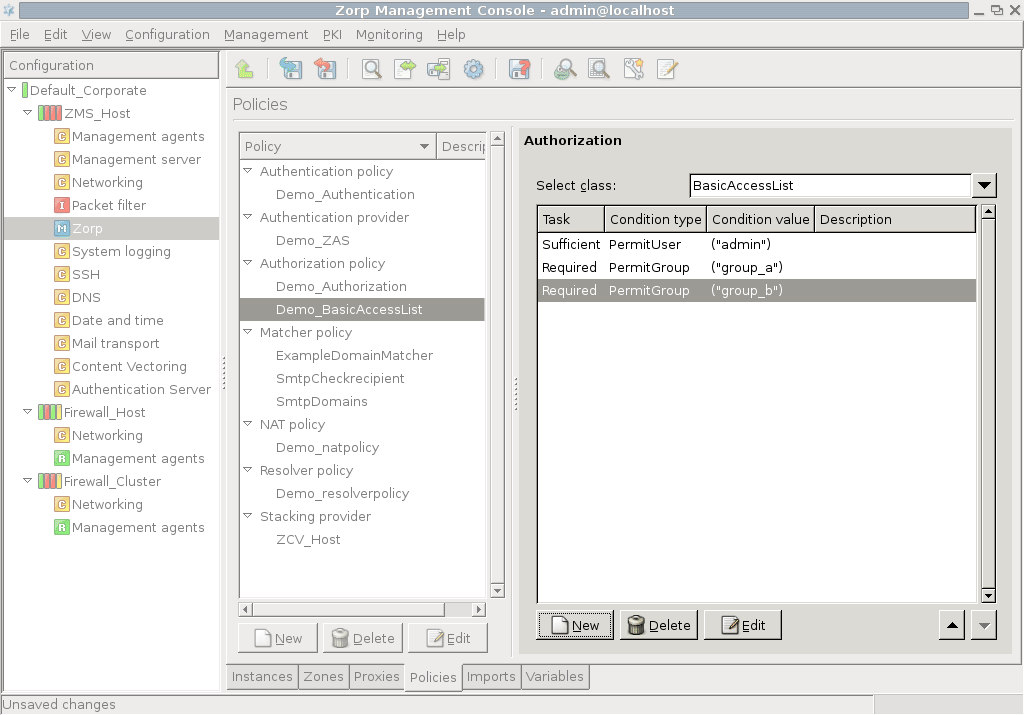
BasicAccessList can be used to create complex authorization scenarios by combining other authorization types into a set of Required or Sufficient conditions. Each condition refers to an authorization type (for example, PermitUser, PairAuthorization, and so on) and (Sufficient or Required). The conditions are evaluated sequentially. A connection is authorized if a Sufficient condition matches the connection, or all Required conditions are fulfilled. If a Required condition is not met, the connection is refused.
| Note |
|---|
Due to the sequential evaluation of the conditions, |
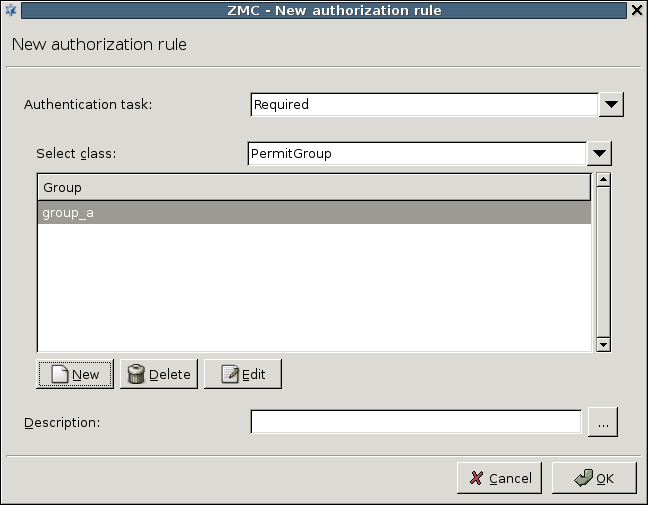
To create a new condition click , and select the type of the condition from the and comboboxes. Then click on , and enter the value for the condition (for example, the username or the name of the group).
| Example 15.1. BasicAccessList |
|---|
|
The following condition list allows the
|
When NEyesAuthorization is used, the client trying to access the service has to be authorized by another (already authorized) client (this authorization chain can be expanded to multiple levels). NEyesAuthorization can only be used in conjunction with another NEyesAuthorization policy. One of them is the authorizer set to authorize the authorized policy.
In a simple 4-eyes scenario the authorizer policy points to the authorized policy in its Authorization policy parameter, and has its Wait for other authorization policies to finish parameter disabled. The authorized policy has an empty Authorization policy parameter (meaning that it is at a lower stage, at the end of an N-eyes chain), and has its Wait for other authorization policies to finish parameter enabled, meaning that it has to be authorized by another policy.
NEyesAuthorization has the following parameters:
: The authorization policy authorized by the current
NEyesAuthorizationpolicy.: If this parameter is set, the client has to be authorized by another client. If set to
FALSE, the current client is at the top of an authorizing chain.Note When setting this parameter, consider the timeout value set in the client application used to access the server. There is no use in specifying a longer time here, as the clients will time out anyway.
: The time (in milliseconds) Zorp will wait for the authorizing user to authorize the one accessing the service.
When this authorization model is used, only two users simultaneously accessing the service are authorized, single users are not permitted to access the service. Set the time (in milliseconds) Zorp will wait for the second user to access the service using the Max time for the pair to arrive spinbutton.
When setting this parameter, consider the timeout valuse set in the client application used to access the server. There is no use in specifying a longer time here, as the clients will time out anyway.
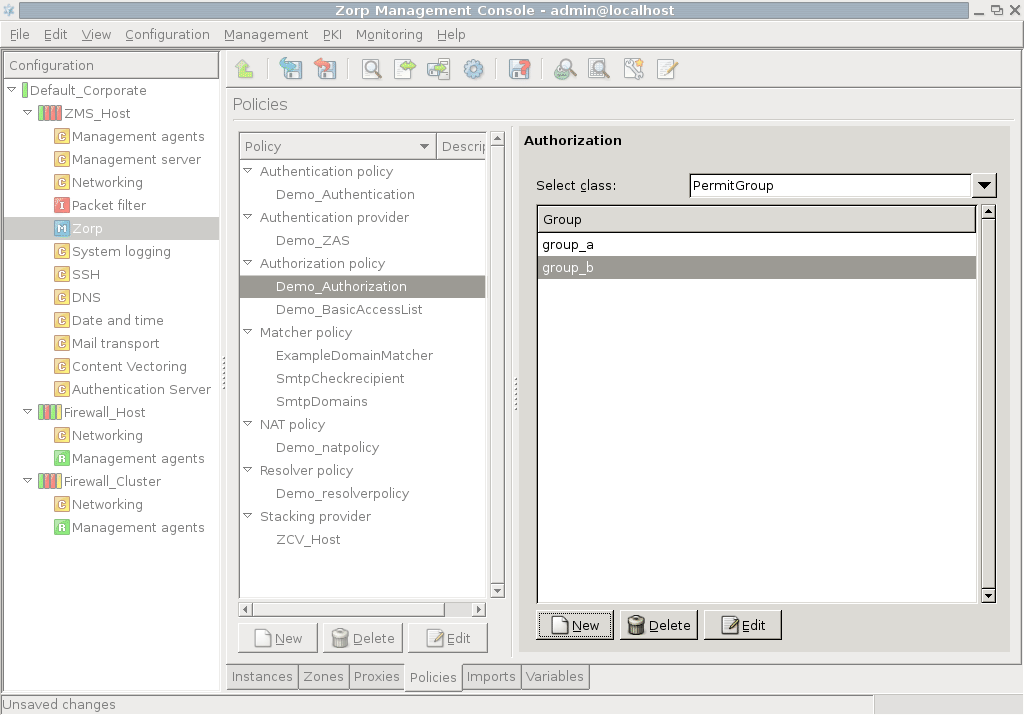
This model allows the members of the specified groups to access the service. Select the grouplist parameter and click . In the appearing list editor window click , then enter the name of an authorized usergroup. Additional groups can be added by clicking again.
| Note |
|---|
The elements of the list can be disabled through the local menu. |
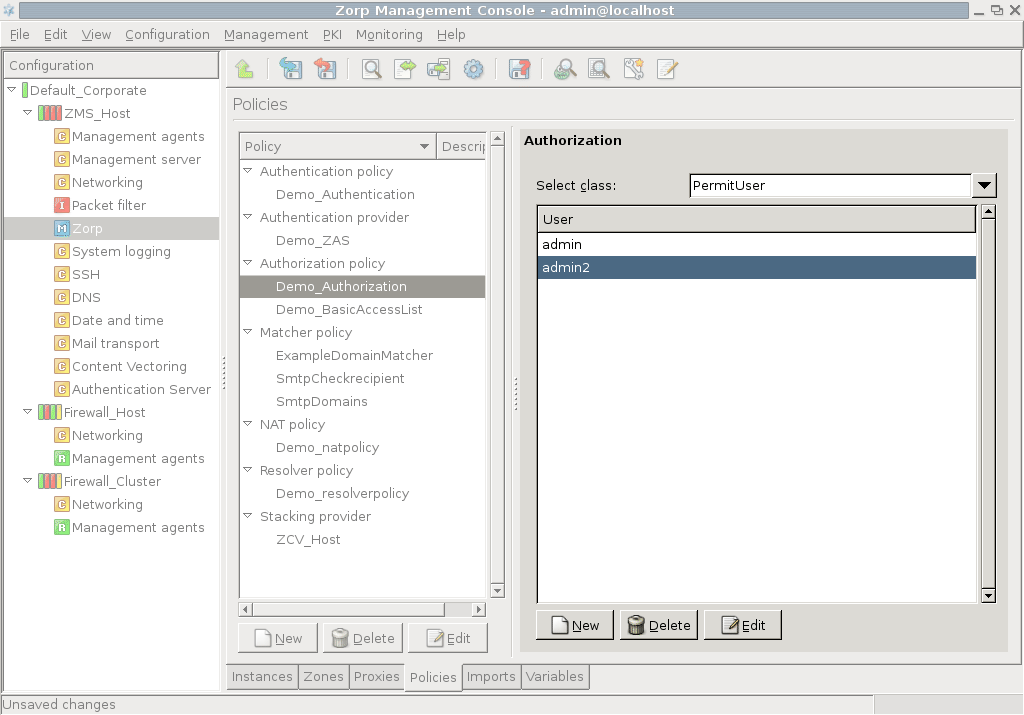
This model allows the listed users to access the service. Select the userlist parameter and click . In the appearing list editor window click , then enter the name of an authorized user. Additional users can be added by clicking again.
| Note |
|---|
The elements of the list can be disabled through the local menu. |
The PermitTime policy stores a set of intervals specified by their starting and ending time — access to a service using such a policy is permitted only within this interval.
To configure an interval, click on , then click . Select the first qstring value and click on . Enter the starting time of the interval (for example, 8:30) and click . The ending time of the interval can be set similarly through the second qstring value.
| Note |
|---|
A single policy can contain multiple intervals. |
Published on May 30, 2024
© BalaSys IT Ltd.
Send your comments to support@balasys.hu


