
11.3.8.2. Procedure – Creating certificates
To create a certificate, complete the following steps.
Select from the menu and click .
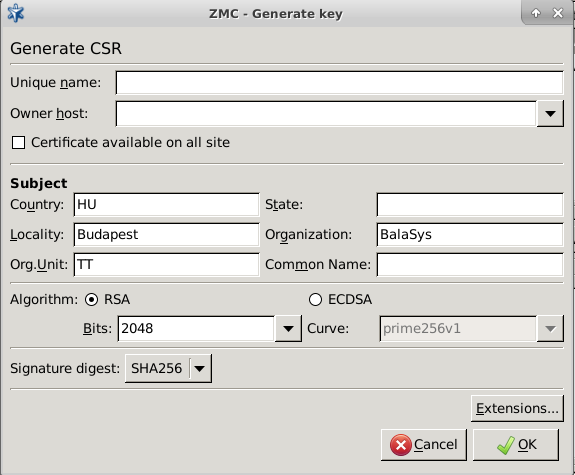
Click , and fill the Generate CSR form.
Enter a that will identify the object containing the certificate and the key in ZMS. Note, that in case after filling in the field, the button is used, the value of the field is also added to the field.
Select the host from the combobox, who will be the owner of the certificate.
If you want the certificate to be available on every site that is managed in ZMS, select .
Fill the Subject section of the request as appropriate. Into the field, enter only a two-letter ID (for example, US). Enter a name for the certificate into the field. Note that in case the fields have been filled in at , those values will automatically be offered here.
Select the length of the key (1024, 2048, or 4096 bit).
Note Longer keys are more secure, but the time needed to process key signing and verification operations (required for using encrypted connections) increases exponentially with the length of the key used. By default, 2048 bit is used.
ZMC 7 can create only RSA keys, generating DSA keys is not supported.
Warning If the certificates/keys have to be used on machines running older versions of the Windows operating system, using only 1024 bit long keys might be required, since these Windows versions typically do not support longer keys.
Select the method (SHA256 or SHA512) to be used for generating the Signature digest (hash).
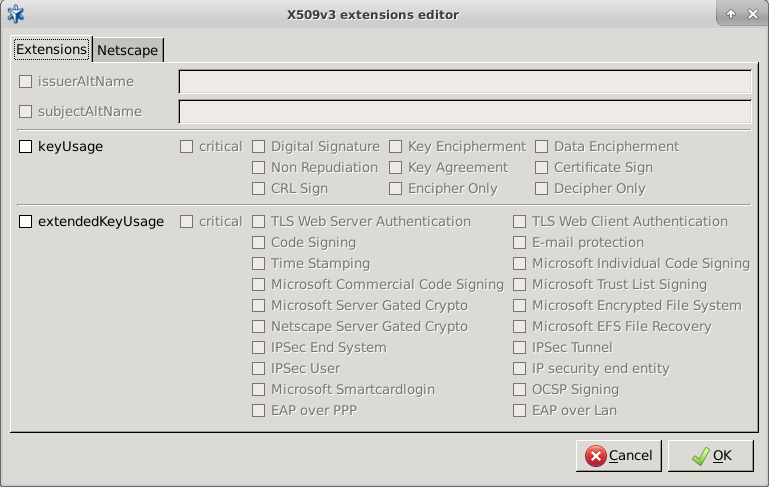
By clicking on , the various purposes of the certificate can be specified. For details on X.509v3 extensions, see Appendix C, Further readings.
After specifying all the required options, click .
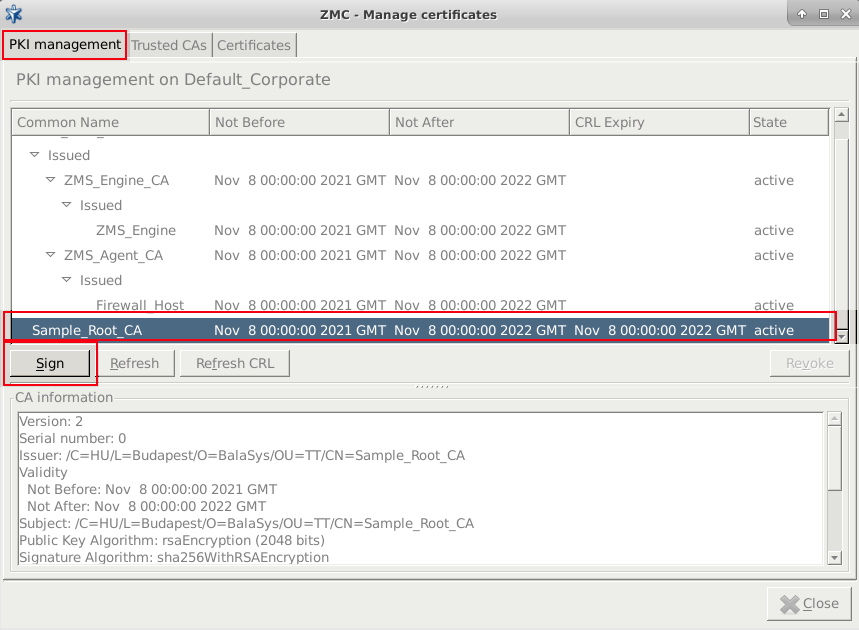
Navigate to the tab, and in the navigation window select the local CA to be used to sign the request (for example,
ZMS_Agent_CAfor transfer agents, and so on).Click on . A window will be displayed listing the submitted but not yet signed certificate signing requests (CSRs). Note, that it is possible to use multi-select here. The list displays the distinguished name of the CSRs, this includes the various Subject fields (Country, locality, common name, and so on) specified when generating the request.
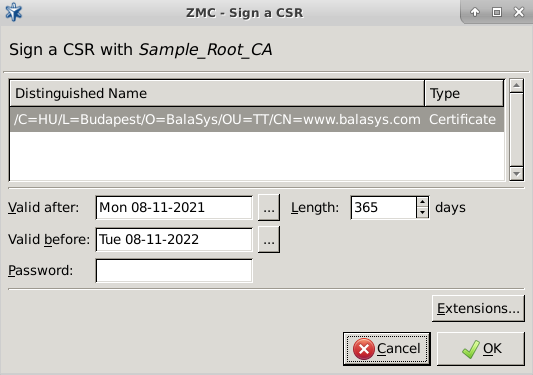
Set the validity period (/ dates) of the certificate. A pop-up calendar is available through the button. Alternatively, after setting the Valid after date, the field can be used to specify the length of the validity in days, automatically updating the field.
By clicking on , various X.509 extensions can be specified. These extensions can be used to ensure in filters that only certificates used for their intended purpose are accepted.
Note Note that although similar configration details can be defined when creating a certificate - and also different settings can be defined for each certificate, the settings defined here will overwrite any other configuration settings and only these settings will be applicable.
Enter the password of the CA required for issuing new certificates, and click .
Published on May 30, 2024
© BalaSys IT Ltd.
Send your comments to support@balasys.hu
