
6.4.1. Procedure – Creating a new service
To create a new service that inspects a traffic on the application level, complete the following steps.
Navigate to the Services tab of the Zorp ZMC component and click .
Enter a name for the service into the opening dialog. Use clear, informative, and consistent service names. It is recommended to include the following information in the service name:
source zones, indicating which clients may use the service (for example,
intranet)the protocol permitted in the traffic (for example,
HTTP)destination zones, indicating which servers may be accessed using the service (for example,
Internet)
Tip Name the service that allows internal users to browse the Web
intra_HTTP_internet. Use dots to indicate child zones, for example,intra.marketing_HTTP_inter.Click
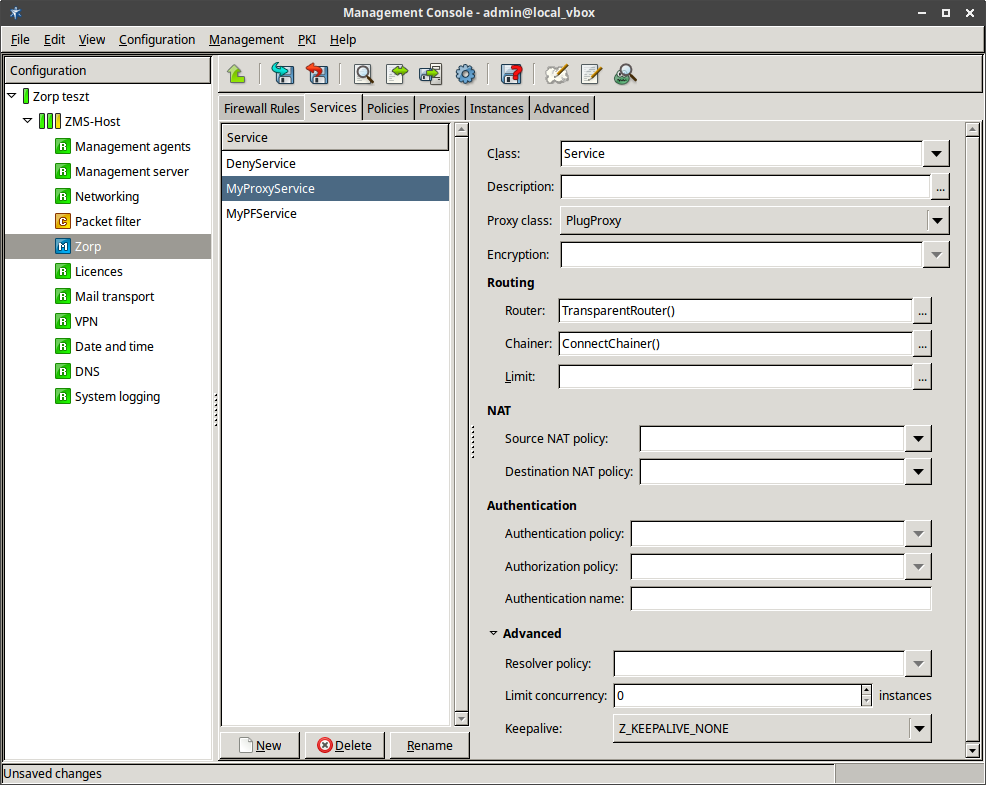
 in the field and select
 Service.In the field, select the application-level proxy that will inspect the traffic. Only traffic corresponding to the selected protocol and the settings of the proxy class can pass the firewall.
Note Zorp has many proxy classes available by default. These can be used as is, or can be customized if needed.
For details on customizing proxy classes, see Section 6.6, Proxy classes.
The settings and parameters of the proxy classes are detailed in the Chapter 4, Proxies in Zorp Professional 7 Reference Guide.
To permit any type of Layer 7 traffic, select . The PlugProxy is a protocol-independent proxy.
Optional Step: If the inspected traffic will be SSL- or TLS-encrypted, select the Encryption Policy to use in the field. For details, see Section 6.7.3, Encryption policies.
Optional Step: In the section, select the method used to determine the IP address of the destination server. For details, see Section 6.4.5, Routing — selecting routers and chainers.
Optional Step: In the section, the Network Address Translation policy used to NAT the address of the client (SNAT), the server (DNAT), or both. For details, see Section 6.7.5, NAT policies.
Note To remove a policy from the service, select the empty line from the combobox.
Note NAT policies cannot be used in packet filtering services (PFServices) for IPv6 traffic.
Optional Step: In the field, select the method used to connect to the destination server. See Section 6.4.5, Routing — selecting routers and chainers for details.
Optional Step: To specify exactly which zones can be accessed using the service, click and select the permitted zones. If this option is set, the target server must be located in the selected zones, otherwise Zorp will reject the connection.
Note The zone set in the option is the actual location of the target server. This is independent from the destination address of the client-side connection.
This option replaces the functionality of the
inband_servicesparameter of the zone.Optional Step: In the section, select the authentication and authorization policies used to verify the identity of the client. See Chapter 15, Connection authentication and authorization for details.
Optional Step: In the field, select how Zorp should resolve the addresses of the client requests. See Section 6.7.6, Resolver policies for details.
Optional Step: To limit how many clients can access the service at the same time, set the option. By default, Zorp does not limit the number of concurrent connections for a service (0).
Optional Step: To send keep-alive messages to the server, to the client, or to both, to keep the connection open even if there is no traffic, set the option to
Z_KEEPALIVE_SERVER,Z_KEEPALIVE_CLIENT, orZ_KEEPALIVE_BOTH.Commit your changes.
Published on May 30, 2024
© BalaSys IT Ltd.
Send your comments to support@balasys.hu
