15.3.2.1. Procedure – Configuring communication between PNS and AS
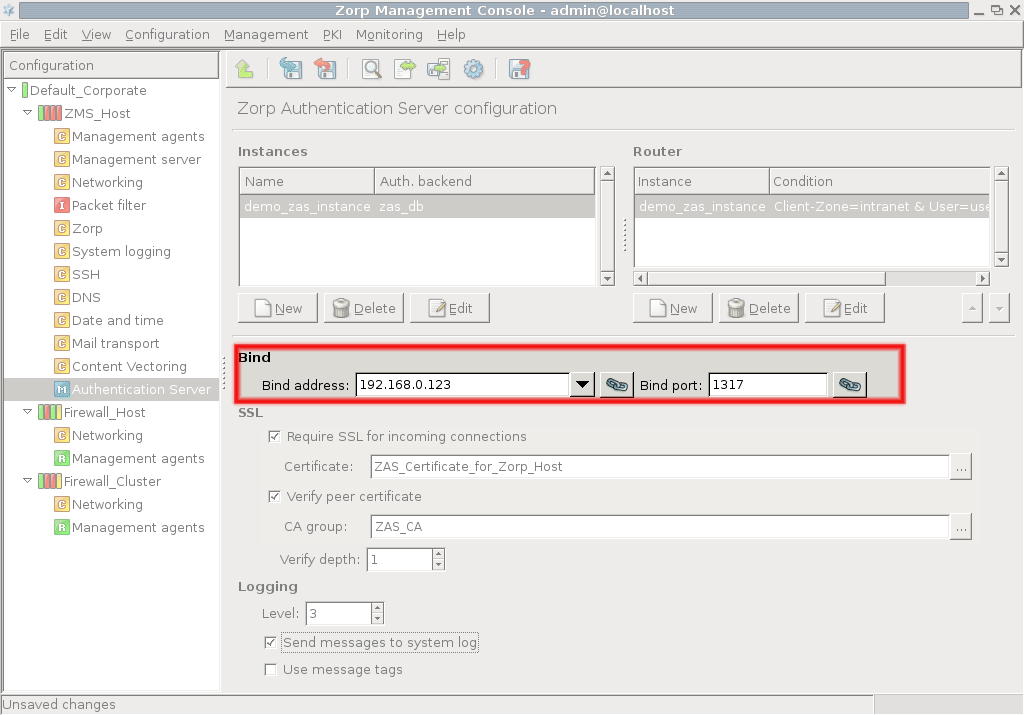
First, the connection settings of AS have to be configured in the section on the MC component. Specify the IP address/port pair on which AS should accept connections.
Tip If AS and PNS are running on the same machine, use the local loopback interface (IP:
127.0.0.1).Note The same bind settings will have to be used when the Authentication provider is configured in the tab of the MC component.
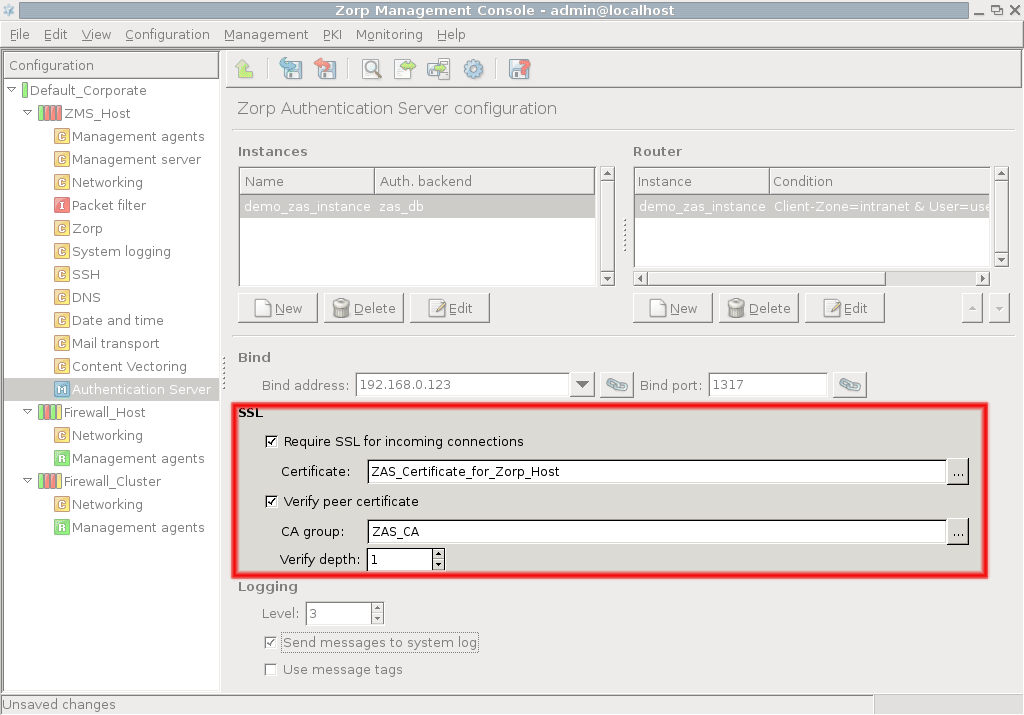
If PNS and AS are running on separate machines, enable and configure SSL encryption. Check the checkbox and click on next to the textbox and select a certificate. This certificate has to be available on the AS host and will be presented to PNS to verify the identity of the AS server. For details about creating certificates, see Procedure 11.3.8.2, Creating certificates.
To enable mutual authentication (that is, to verify the certificate of PNS), check the checkbox and select the containing the trusted certificates. Also make sure to set the high enough so that the root CA certificate in the CA chain can be verified. The default value (3) should be appropriate for internal CAs.
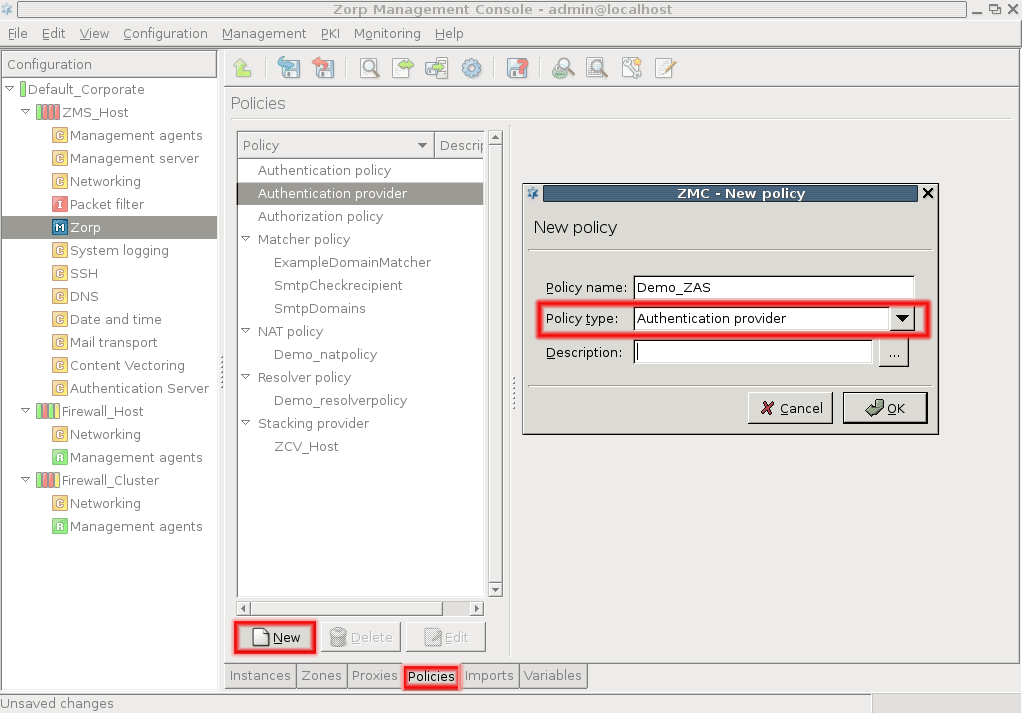
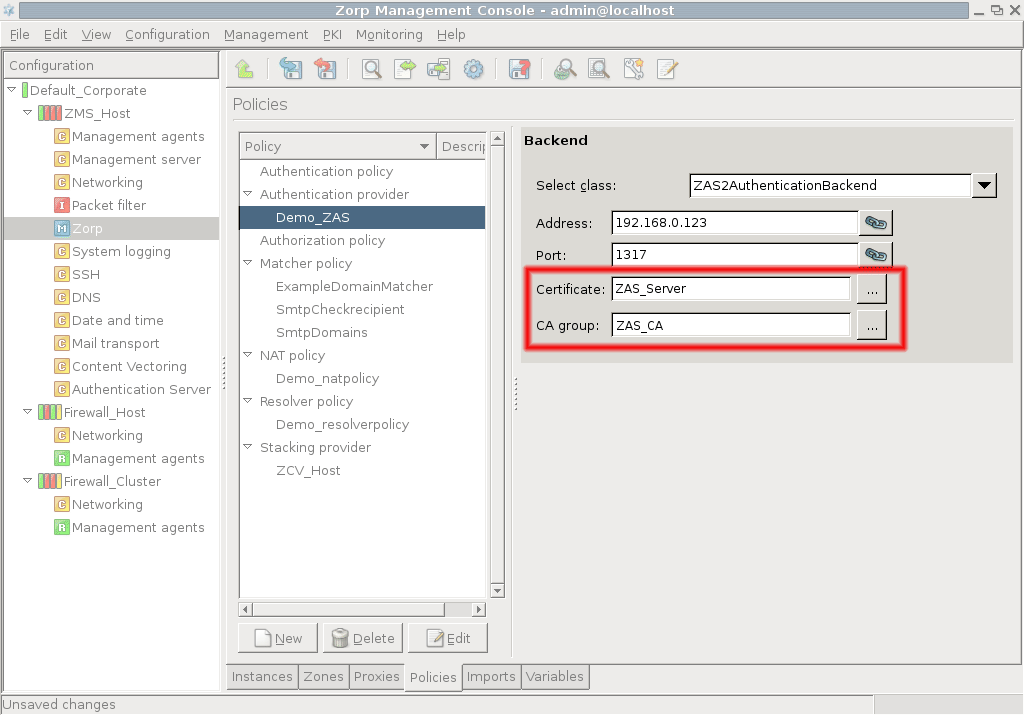
The connection also has to be set up from the PNS side. This can be accomplished by creating an on the tab of the MC component. Click on , select from the combobox, and enter a name for the provider into the textbox.
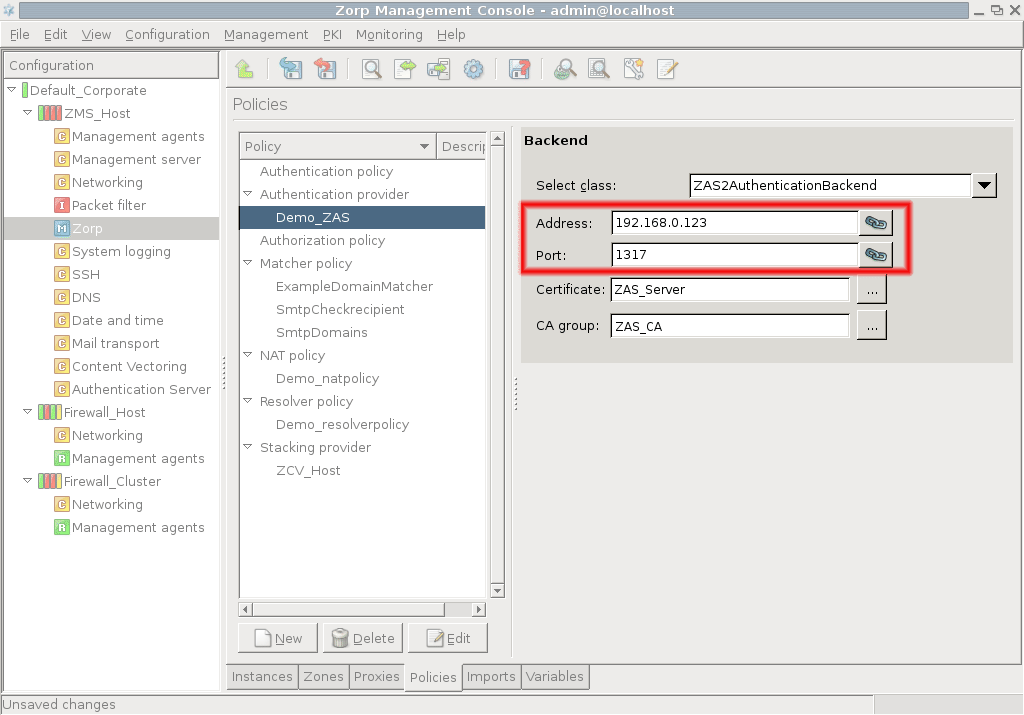
Enter the IP address of the AS server into the field. This must be the same address as specified as for AS in Step 1.
If SSL encryption was enabled in Step 2, select the PNS will show to AS. PNS can also verify the certificate shown by AS using the CAs specified in .
Note Obviously, the CAs issuing the certificates of PNS and AS must be members of the CA groups set to be used to perform the verification of the certificates, otherwise the verification will fail.
Published on June 04, 2020
© 2007-2019 BalaSys
Send your comments to support@balasys.hu


