16.3.1. Procedure – Configuring IPSec connections
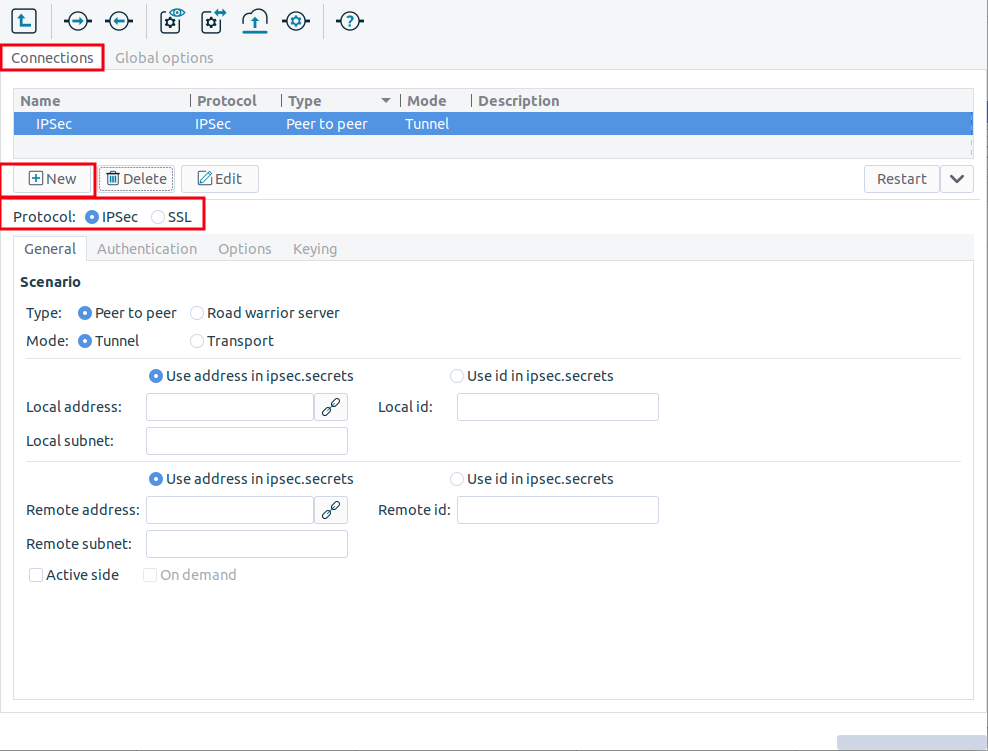
Navigate to the VPN component of the PNS host that will be the endpoint of the VPN connection. Select the tab.
Click and enter a name for the connection.
Select the protocol option.
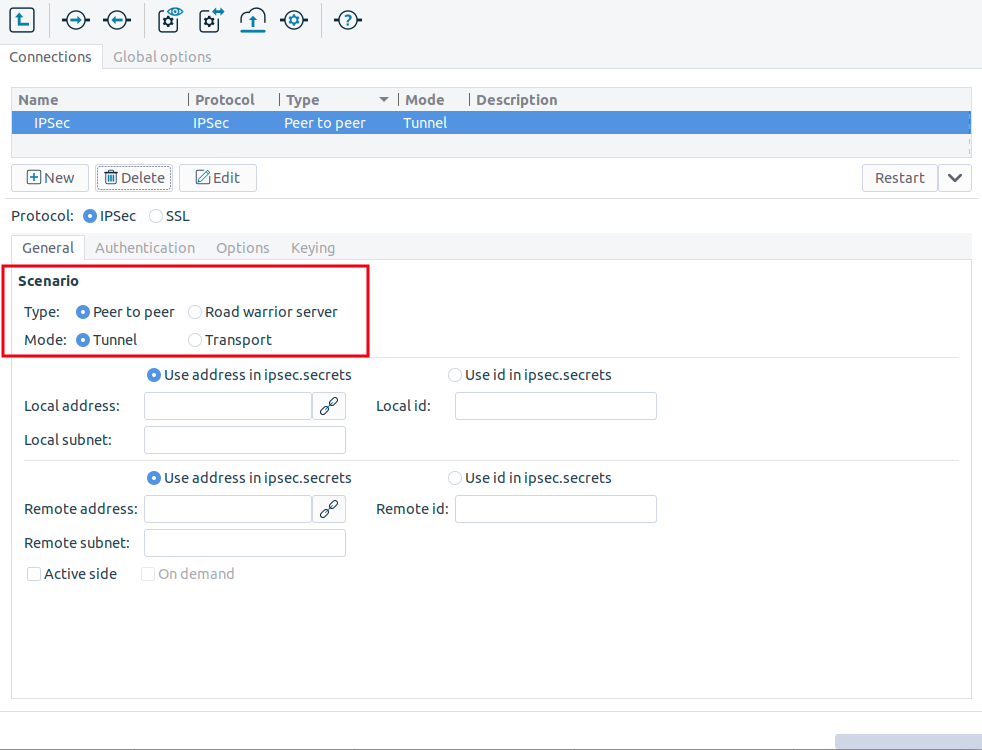
Set the VPN topology and the transport mode in the section on the tab.
To create a Peer-to-Peer connection, select the and the options.
To create a Peer-to-Network connection, select the and the options.
To create a Roadwarrior server, select the and the options.
To create a Network-to-Network connection, select the and the options.
Note When creating a Network-to-Network connection, the two endpoints of the VPN tunnel do NOT use the VPN to communicate with each other. To encrypt the communication of the endpoints, create a separate Peer-to-Peer connection.
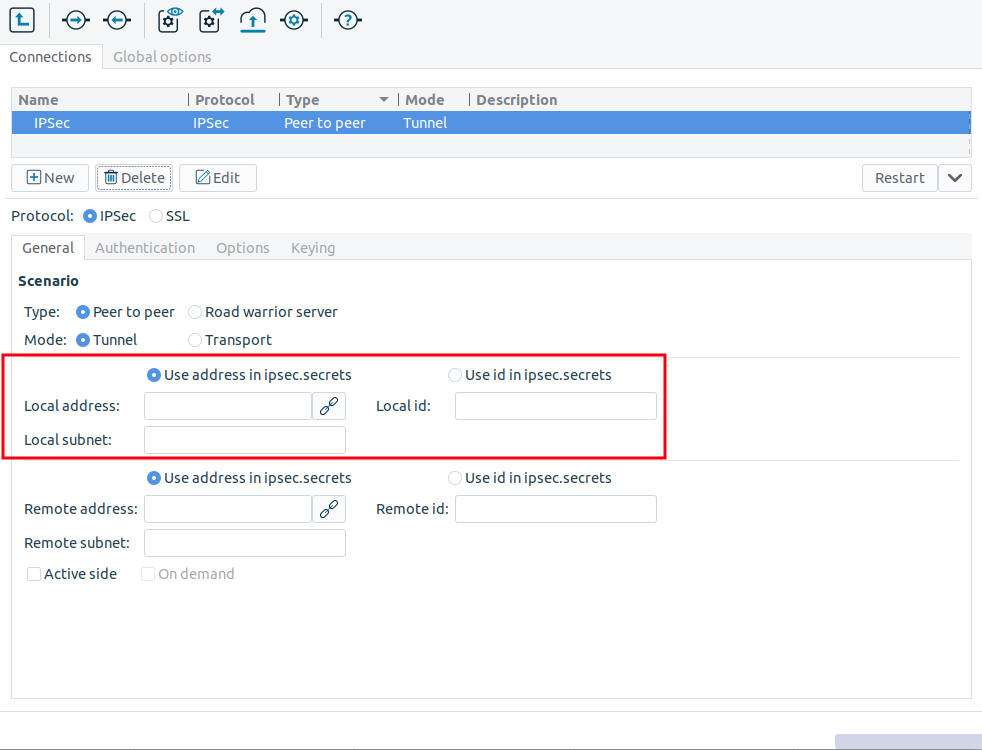
Configure the local networking parameters.
These parameters affect the PNS endpoint of the VPN connection. Set the following parameters:
: Select the IP address that PNS will use for the VPN connection.
: It is the ID of the PNS endpoint in the VPN connection. Leave this field blank unless you experience difficulties in establishing the connection with the remote VPN application. If you set the , you might also want to set the option.
: It is the subnet behind PNS that will be accessible using the VPN tunnel. This option is available only for Peer-to-Network and Network-to-Network connections.
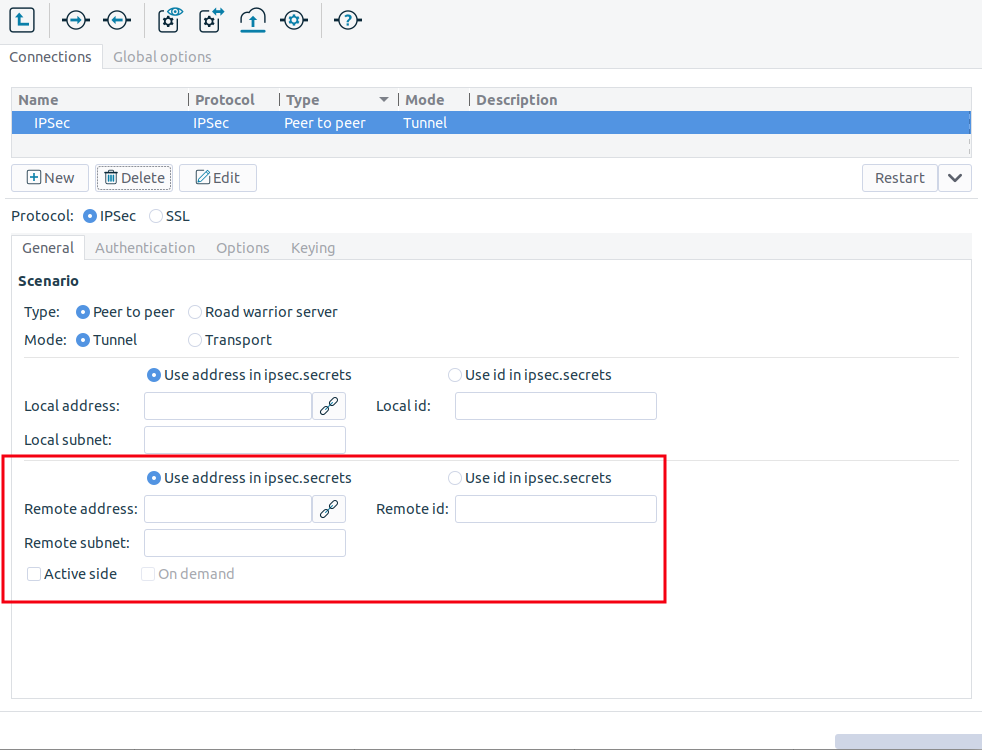
Configure the networking parameters of the remote endpoint. Set the following parameters:
: It is the IP address of the remote endpoint. It does not apply for roadwarrior VPNs.
: It is the ID of the remote endpoint in the VPN connection. Leave this field blank unless you experience difficulties in establishing the connection with the remote VPN application. If you set the , you might also want to set the option.
: It is the subnet behind the remote endpoint that will be accessible using the VPN tunnel. This option is available only for Peer-to-Network and Network-to-Network connections.
Note Network-to-Network connections connect the subnets specified in the and parameters.
Do not specify the subnet parameter for the peer side of Peer-to-Network connections, leave either the or the parameter empty.
When configuring or connections, it is crucial that the endpoint operators cooperate. If the option is selected, PNS opens the VPN connection to the remote endpoint. It is possible to enable the option on both sides, but if the tunnel is unstable, it is recommended to enable it only on one side.
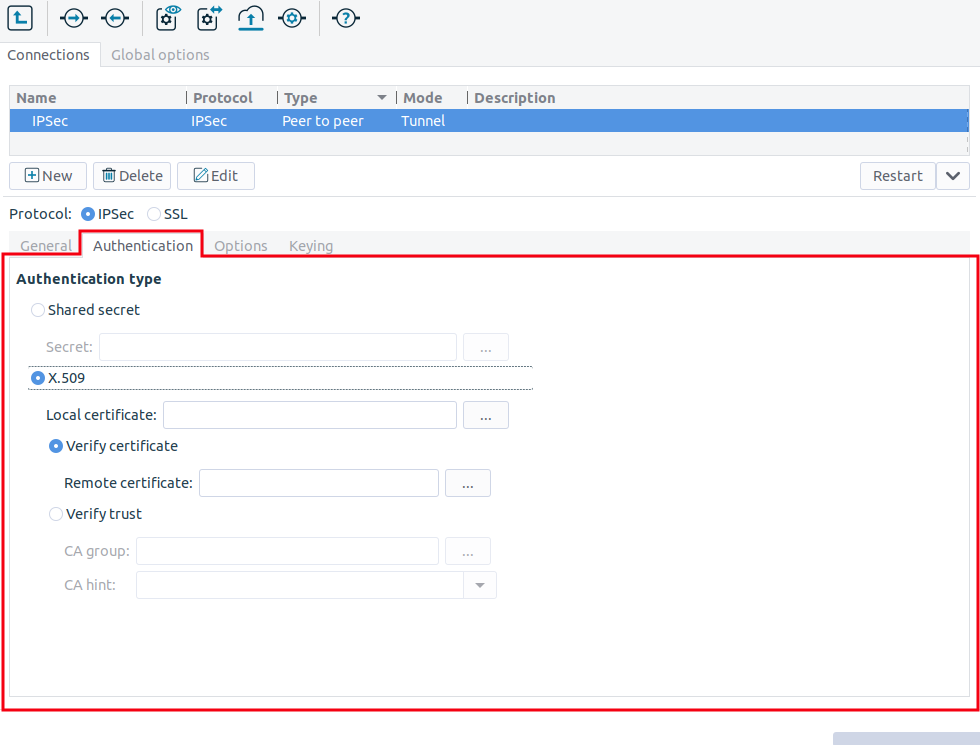
Click on the tab and configure authentication.
To use password-based authentication, select the option and enter the password in the field.
Note Authentication using a shared secret is not a secure authentication method. Use it only if the remote endpoint does not support certificate-based authentication. Always use long and complicated shared secrets: at least twelve characters containing a mix of alphanumerical and special characters. Remember to change the shared secret regularly.
To use certificate-based authentication, select the option and set the following parameters:
: Select a certificate available on the PNS host. PNS will show this certificate to the remote endpoint.
If the remote endpoint has a specific certificate, select the option and select the certificate from the field. PNS will use this certificate to verify the certificate of the remote endpoint.
If there are several remote endpoints that can connect to the VPN tunnel, select the option and select the trusted Certificate Authority (CA) group containing the CA certificate of the CA that issued the certificates of the remote endpoints from the field. PNS will use this trusted CA group to verify the certificates of the remote endpoints. (See Section 11.3.7, Trusted CAs for details.)
PNS sends the common name of the accepted CAs to the remote endpoint, so the client knows what kind of certificate is required for the authentication. Select a specific CA certificate using the option if you want to accept only certificates signed by the selected CA.
Note See Chapter 11, Key and certificate management in PNS for details on creating and importing certificates, CAs, and trusted CA groups required for certificate-based authentication.
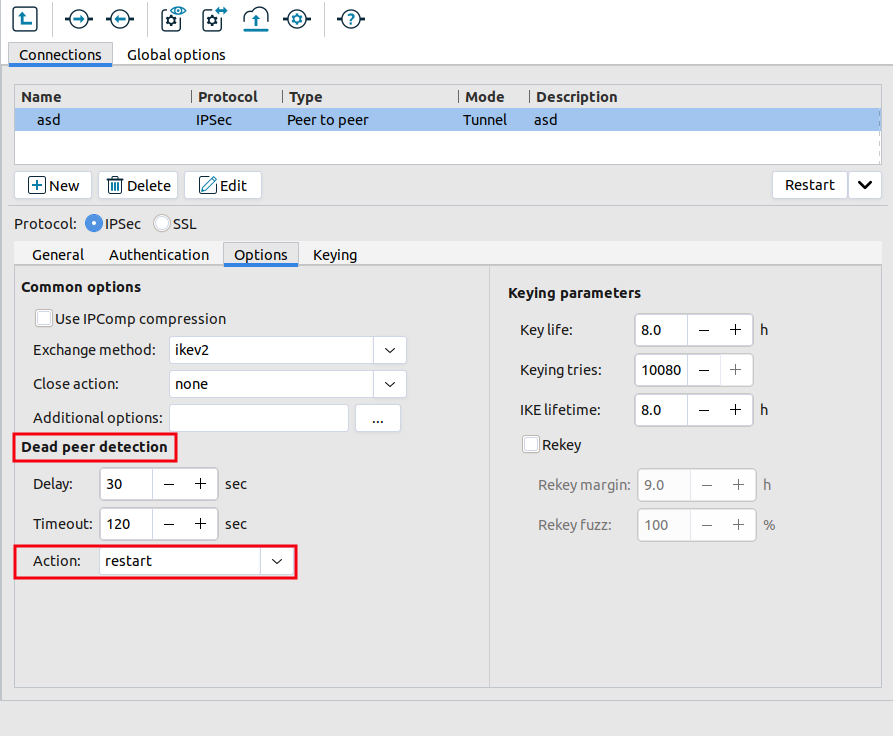
Before setting the action status of the Dead Peer Detection option, it is necessary that the two endpoint operators agree on the preferred settings. If earlier the option was selected for PNS, it is recommended to select the
restartoption of Action parameter. This way PNS attempts to restart the VPN connection if the remote endpoint becomes unavailable.If PNS is on the passive side and earlier the option was not enabled, it is recommended to set the Action parameter of the Dead Peer Detection to
holdfor PNS and set this parameter torestarton the remote endpoint.Note Dead Peer Detection is effective only if enabled on both endpoints of the VPN connection. If Dead Peer Detection is enabled only on one side, and it is disabled on the other side it may lead to unreliable VPN connection. If Dead Peer Detection is not required, it must be disabled at both endpoints.
The following additional parameters can be configured for Dead Peer Detection:
Delay
This parameter defines the time interval in which informal messages are sent to the peer.
Timeout
This parameter defines the timeout interval after which all connections to a peer are deleted in case of inactivity.
Action
This parameter controls the usage of Dead Peer Detection protocol, where informal messages are periodically sent to check whether the connection toward the IPSec peer is live or not.
The available values are: clear, restart and none.
The values clear, hold and restart activate Dead Peer Detection and instruct on the action to be taken in case of timeout.
If the parameter is set to clear, the connection shall be closed without any further action taken.
If the parameter is set to hold, matching traffic will be searched for and renegotiation on the connection will be tried.
If the parameter is set to restart, an immediate attempt will take place for renegotiating the connection.
If the parameter is set to none, no more Dead Peer Detection messages will be sent to the peer.
Set other options if needed. See Section 16.3.2, IPSec options for details.
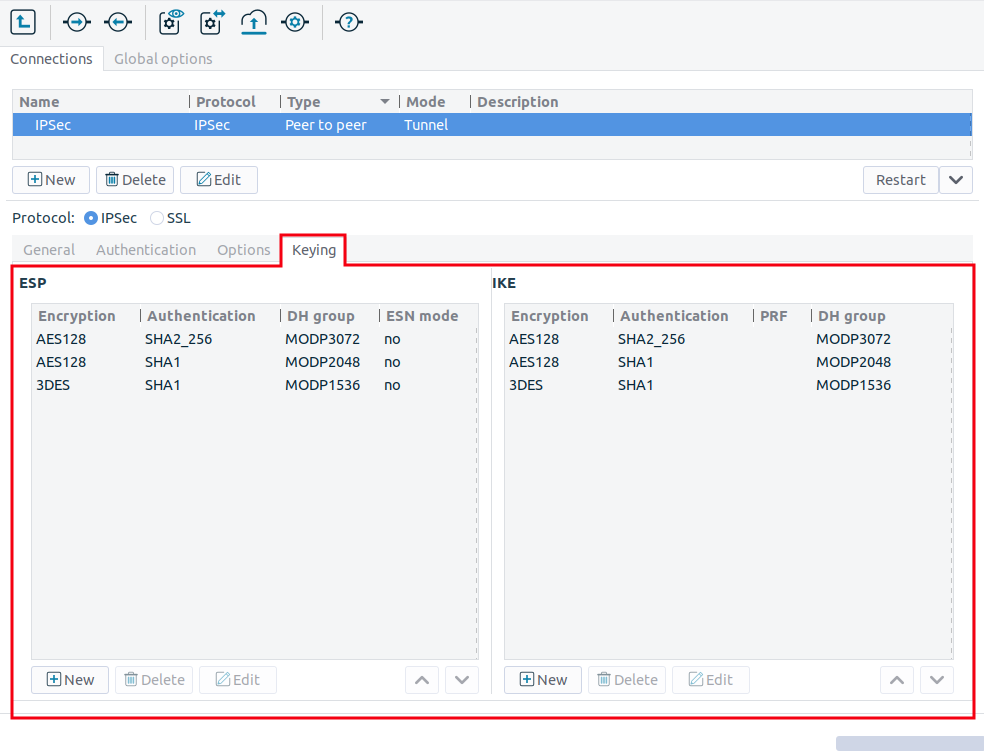
Configure the parameters of the Keying tab, if necessary.
Encapsulating Security Payload (ESP)
This list presents the Encapsulating Security Payload (ESP) encryption and authentication algorithms that shall be used for the actual connection.
If the DH group is also specified, it defines that Diffe-Hellman (DH) exchange shall be included in re-keying or in initial negotiation.
The ESN parameter defines whether Extended Sequence Number (ESN) support with the peer is enabled or not. The default value is 'no'.
Internet Key Exchange (IKE)
This list presents the Internet Key Exchange (IKE) encryption and authentication algorithms that shall be used for the actual connection.
If the DH group is also specified, it defines that Diffe-Hellman exchange shall be included in re-keying or in initial negotiation.
If no Pseudo Random Function (PRF) algorithm is configured, the algorithms defined for integrity are proposed as PRF.
Copyright: © 2021 Balasys IT Security
Send your comments to support@balasys.hu


