
4.1. Procedure – Bootstrap a new host
Purpose:
To bootsgrap a new host, complete the following steps.
Steps:
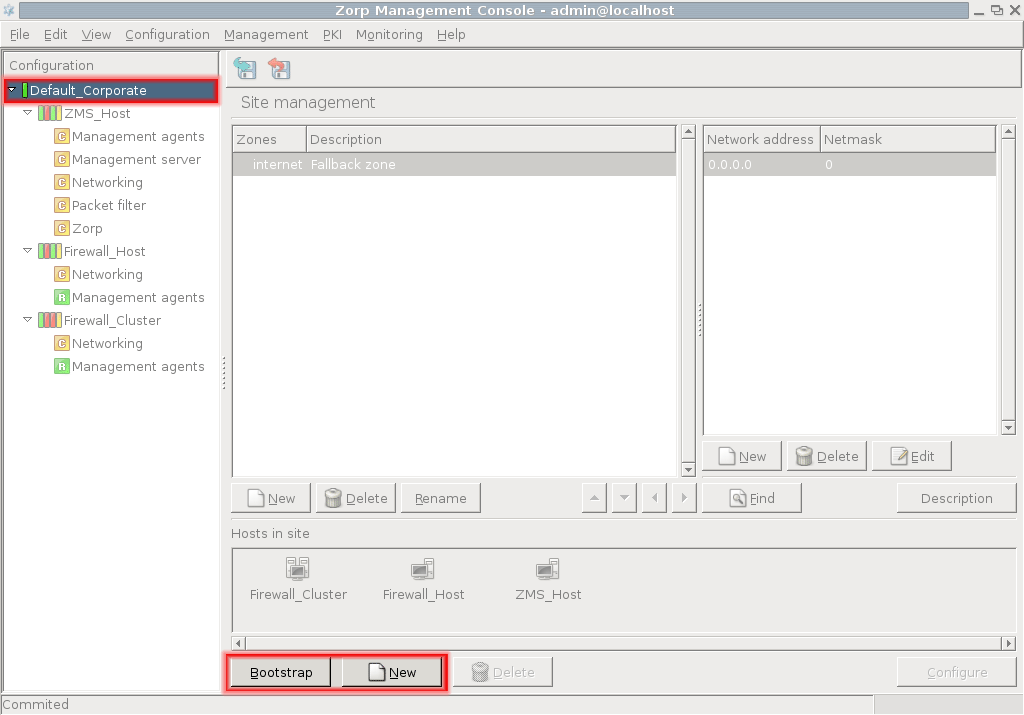
Select the desired site in the configuration tree.
Click at the bottom of the screen. This will start the wizard.
Note Alternatively, to register a host manually, click next to .
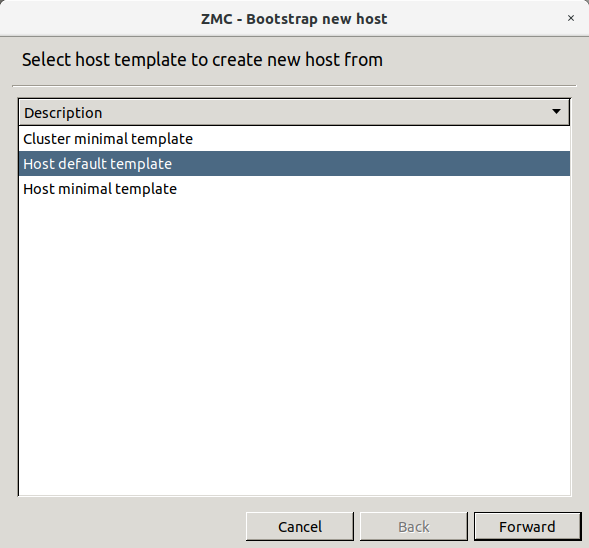
Select a host template.
The default templates are the following. New templates can be created later.
To configure clustered solutions.
To add the , and components automatically to the tree under the name of the newly added host.
For details, see:
To add only the two default components: and .
It is recommended to select the because it alredy has some components pre-configured.
Tip If you work with several PNS hosts it can be useful to create predefined templates, to save repetitive work. For details on creating templates manually, see Chapter 6, Managing network traffic with PNS.
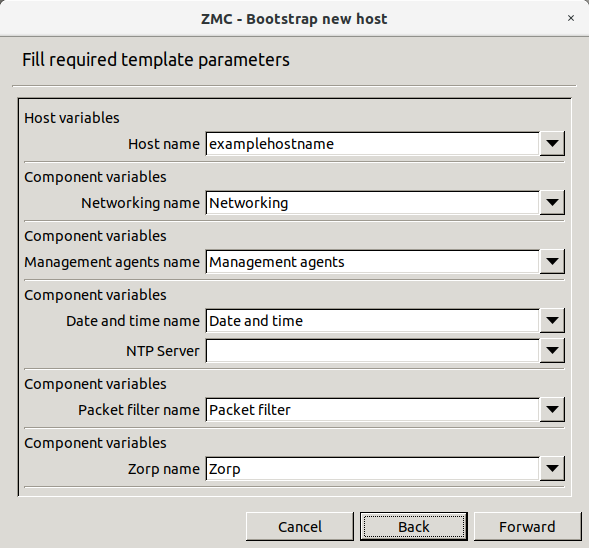
Enter the details of the new host.
: the name of your PNS firewall.
: The name of the component.
: The name of the component.
: The name of the component.
: The name of the component.
: Specify a time server that PNS synchronizes its system time with. Usually, but not necessarily it is an external time source. For the up-to-date list of publicly available time servers, see http://support.ntp.org/bin/view/Servers/WebHome. For more information on NTP, see Chapter 9, Native services.
: The name of the component.
: The name of the component.
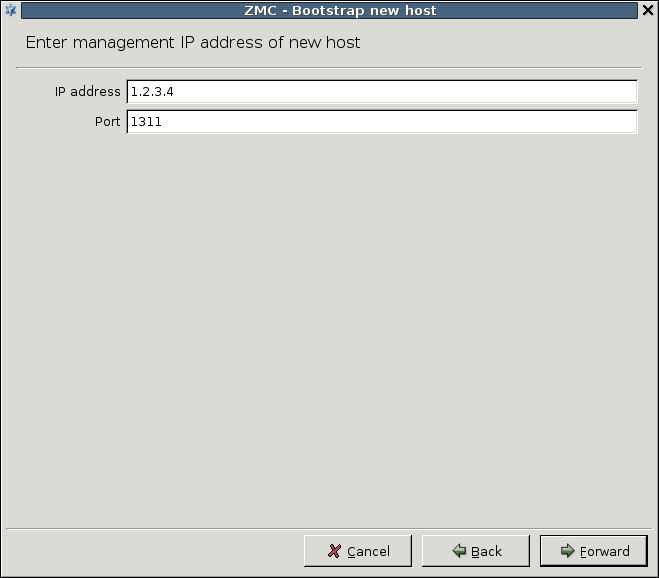
Enter the IP address and configuration port number of the Transfer agent.
Before you start, discover which network interface and IP address is reachable from your network location. Firewalls almost always have more than one of these. Ensure that the IP address you type in is reachable from your location and that packets will find their way back from the firewall. In other words, make sure that all routing information is correctly configured.
You can configure other interfaces of PNS to be reachable for configuration purposes later.
Enter the .
Refer to the Firewall's installation documentation for the IP address information.
Leave the field default (
1311.
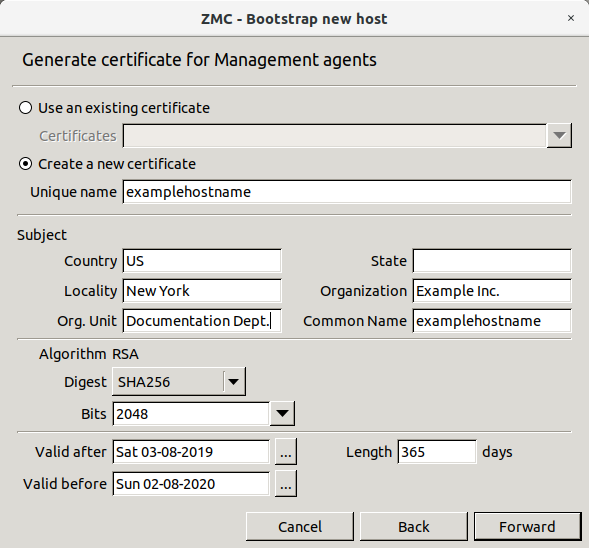
Create a certificate for SSL communication establishment
Firewalls are administered from a protected, inside interface and while this method is highly recommended, it is not necessarily required. All the configuration traffic is encrypted, using SSL.
The administrative connection is encrypted using SSL, which requires a certificate, especially the public key it contains. This certificate and the private key used for encryption/decryption are sent to the Management agent on the firewall node that uses it to encrypt the session key it generates. For more information on SSL communication establishment, see Chapter 11, Key and certificate management in PNS.
Enter the parameters of the certificate and it will be generated automatically.
To , enter a name for the certificate in the field. Alternatively, to , browse for a certificate from . The following steps describe the details of creating a new certificate.
Tip There are no particular requirements for the and fields other than trivial string length and restricted character issues. However, it is recommended to enter a name that will later — when there are more certificates in use in your system — uniquely and easily identify this certificate as the one used for establishing agent communication.
In the field, enter the two-character country code of the country where PNS is located. For example, to refer to the United States, enter
US.Optional step: In the field, enter the state where PNS is located, if applicable. For example,
California.In the field, enter the name of the city where PNS is located. For example,
New York.In the field, enter the name of the company that owns PNS. For example,
Example Inc..In the field, enter the department of the company that administers PNS. For example,
IT Security.Enter a that describes you or your subdivision.
Alternatively, you can use the default value: the name of your PNS firewall node.
Configure the RSA algorithm. Select whether to use
SHA-256orSHA-512. Select the asymmetric key length from the list.Note The U.S. National Institute for Standards and Technology (NIST) recommends
2048-bit keys for RSA.Configure the validity range of the certificate.
To select the start date from the field, click
 .
.To configure the validity range, either select the end date from the field by clicking
or enter the validity in days and press Enter.
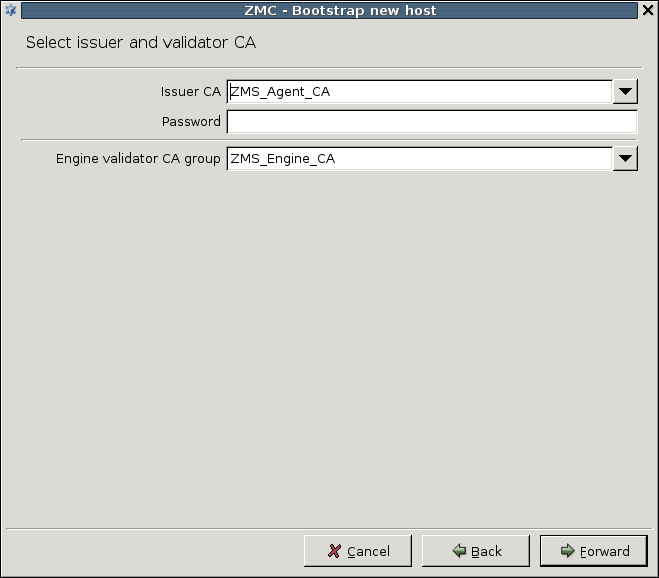
Enter MS Agent CA password.
Manually entered passwords protect private keys against possible unauthorized access. Even if an attacker has read access to your hosts, your private keys cannot be stolen (read). These passwords are used to encrypt the private keys and therefore they are never stored in unencrypted format at all. Certificates are issued by Certificate Authorities (CA) and it is actually the CA's private key that requires this protection. The certificate used by the Management agents are issued by the MS_Agent_CA. You have to enter the password for this CA that you defined for this purpose when installing MS service. See also Chapter 11, Key and certificate management in PNS.
Note To generage a strong password, it is recommended to use a password generator.
Tip Take detailed logs of the installation process, including the bootstraps where all these passwords are recorded.
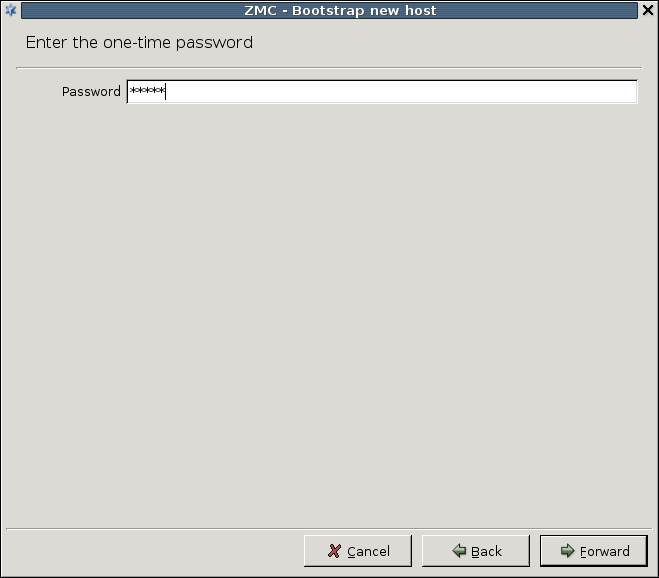
Enter the One-Time Password.
The is the one that you have entered during the installation of zms-transfer-agent on the PNS host. It is a one-time operation: to establish an SSL channel between the Management agents of PNS and the MS host, certificates are required. Yet there are no certificates to use, therefore you have to provide the zms-transfer-agent on PNS a certificate to use for communication channel buildup purposes. This password is used to establish a preliminary encrypted communication channel between PNS and the MS host, where the certificate can be sent. All communication among the parties is performed using SSL.
Click the final button if all password phases were successful to build up the connection.
The displayed logs provide information about the steps the wizard takes in the background. To save the output for later analysis if needed (either by you or support personnel), click .
Note If anything goes wrong the wizard takes you back to the window you made a mistake in, so that you can correct it.
After the bootstrap process has finished successfully, the new host is ready to be configured.
Published on June 04, 2020
© 2007-2019 BalaSys
Send your comments to support@balasys.hu
