
4.1. Procedure – Configuring Server Name Indication (SNI)
Purpose:
To configure an HttpProxy in a name-based virtual hosting scenario that uses Server Name Indication (SNI) to determine the address of the target server, complete the following steps.
Steps:
Create and configure an Encryption Policy. Complete the following steps.
Navigate to the ZMC component of the firewall host.
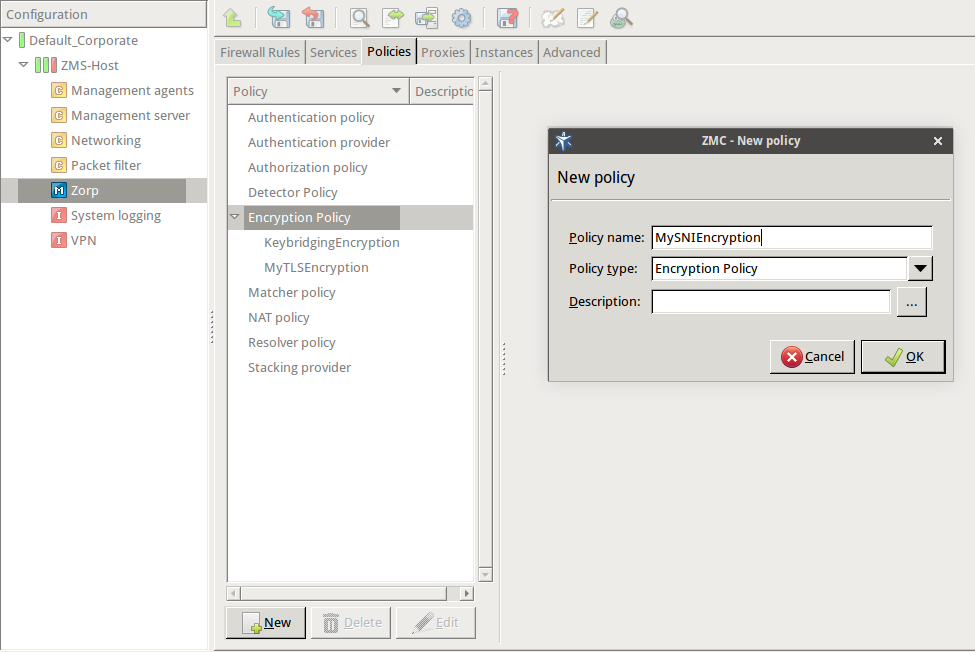
Select .
Enter a name into the field, for example,
MySNIEncryption.Select , then click OK.
Select .
Python:
EncryptionPolicy(
    name="MySNIEncryption",
    encryption=TwoSidedEncryption()
    )
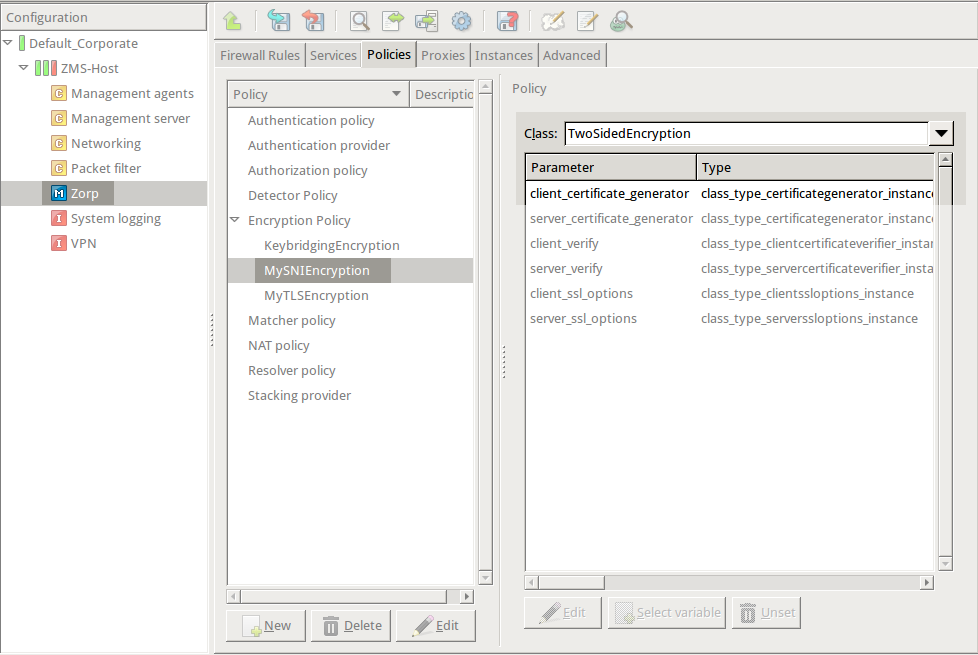
Double-click , then select .
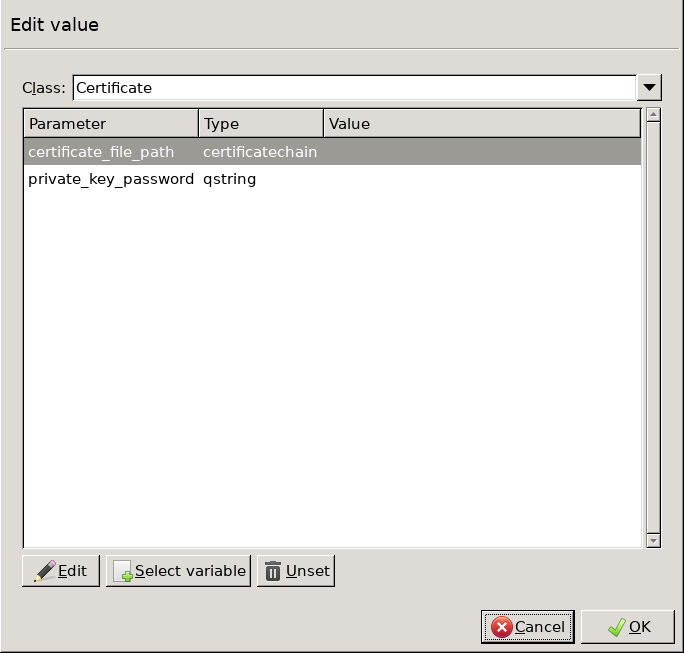
Double-click and click to add a certificate entry to a list of certificates.
Select the default certificate. Zorp will show this certificate to the clients when none of the other configured certificates match the client request.
Python:
    encryption=TwoSidedEncryption(
        client_certificate_generator=SNIBasedCertificate(
            default=StaticCertificate(
                certificates=(
                    Certificate.fromFile(
                        certificate_file_path="/etc/key.d/ZMS_Engine/cert.pem",
                        private_key=PrivateKey.fromFile(
                            "/etc/key.d/ZMS_Engine/key.pem")),
                )
            )
        )
    )
Configure a mapping that describes to which hostname the list of certificates belongs to. For each certificate, configure a Matcher Policy. If this policy matches the domain name in the client SNI request, Zorp shows the associated certificate to the client. Any type of matcher policy can be used here, but in most scenarios only RegexpMatcher policies will be needed. (For details on Matcher Policies, see Section 6.7.4, Matcher policies in Zorp Professional 7 Administrator Guide.)
The following example configures two matchers and two certificates, one for the
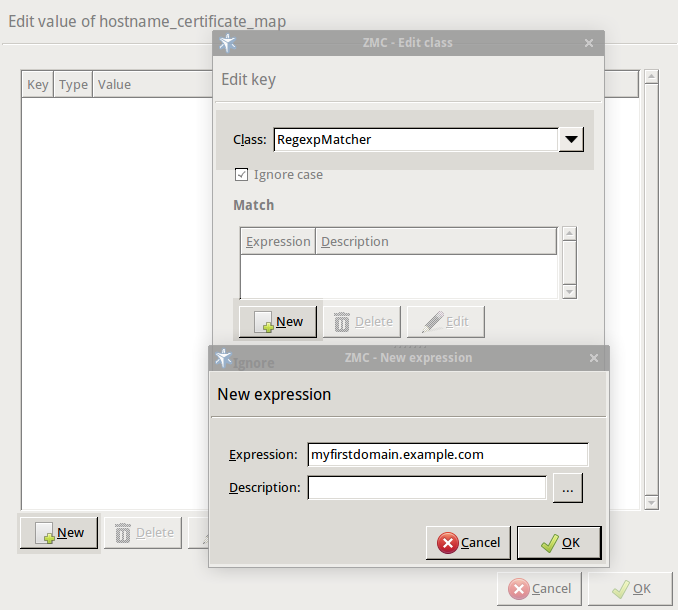
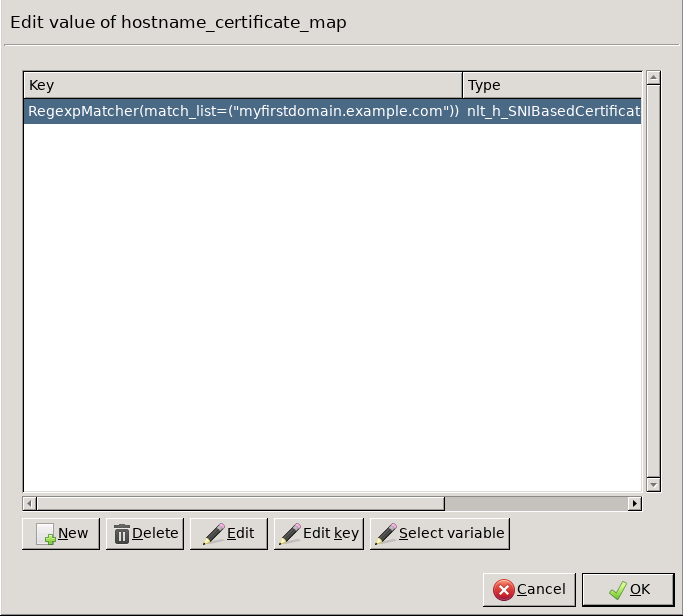
myfirstdomain.example.comdomain, one for themyseconddomain.example.comdomain. Complete the following steps:Double-click , then click .
Select .
Click , then enter the domain name (for example,
myfirstdomain.example.com) into the field. Click .Click and click to add a certificate entry to a list of certificates.
Double-click and select the certificate to show if a client tries to access the domain set in the previous step.
Click , then click .
Click OK to close the list editor.
Repeat from Step 'a' to Step 'e' for the
myseconddomain.example.comdomain and its respective certificate.
Python:
    encryption=TwoSidedEncryption(
        client_certificate_generator=SNIBasedCertificate(
            default=StaticCertificate(
                certificates=(
                    Certificate.fromFile(
                        certificate_file_path="/etc/key.d/ZMS_Engine/cert.pem",
                        private_key=PrivateKey.fromFile(
                            "/etc/key.d/ZMS_Engine/key.pem")),
                )),
            hostname_certificate_map={
                RegexpMatcher(
                    match_list=("myfirstdomain.example.com", )): StaticCertificate(
                        certificates=(
                            Certificate.fromFile(
                                certificate_file_path="/etc/key.d/myfirstdomain/cert.pem",
                                private_key=PrivateKey.fromFile(
                                    "/etc/key.d/myfirstdomain/key.pem")),
                        )),
                RegexpMatcher(
                    match_list=("myseconddomain.example.com", )): StaticCertificate(
                        certificates=(
                            Certificate.fromFile(
                                certificate_file_path="/etc/key.d/myseconddomain/cert.pem",
                                private_key=PrivateKey.fromFile(
                                    "/etc/key.d/myseconddomain/key.pem")),
                        ))
                },
        )
    )
Configure the other options of the Encryption Policy as needed for your environment.
Create a service and a firewall rule that uses this new Encryption Policy and an HttpProxy class.
Python:
def demo() :
    Service(
        name='demo/inter_HttpSNIService',
        router=TransparentRouter(),
        chainer=ConnectChainer(),
        proxy_class=HttpProxy,
        max_instances=0,
        max_sessions=0,
        keepalive=Z_KEEPALIVE_NONE,
        encryption_policy="MySNIEncryption"
    )

    Rule(
        rule_id=300,
        src_subnet=('internet', ),
        dst_zone=('dmz', ),
        proto=6,
        service='demo/inter_HttpSNIService'
    )

Published on May 30, 2024
© BalaSys IT Ltd.
Send your comments to support@balasys.hu
