
2.1. Procedure – Enabling SSL-encryption in the connection
Purpose:
To proxy HTTPS connections, you have to configure an Encryption Policy to handle SSL/TLS connections, and use this Encryption Policy in your Service. The policy will be configured to:
Require the client and the server to use strong encryption algorithms, the use of weak algorithms will not be permitted.
Enable connections only to servers with certificates signed by CAs that are in the trusted CAs list of the PNS firewall node. (For details on managing trusted CA groups, see Section 11.3.7.3, Managing trusted groups in Proxedo Network Security Suite 1.0 Administrator Guide.)
The clients will only see the certificate of PNS. To allow the clients to access the certificate information of the server, see Procedure 2.2, Configuring keybridging in How to configure SSL proxying in PNS 1.0.
Steps:
Generate a certificate for your firewall. The Application-level Gateway component requires its own certificate and keypair to perform SSL/TLS proxying.
MC: Create a certificate, set the firewall as the owner host of the certificate, then distribute it to the firewall host. For details, see Chapter 11, Key and certificate management in PNS in Proxedo Network Security Suite 1.0 Administrator Guide.
Python: In configurations managed manually from python, create an X.509 certificate (with its related keypair) using a suitable software (for example, OpenSSL) and deploy it to the PNS firewall host (for example, copy it to the
/etc/key.d/mycertfolder).Create and configure an Encryption Policy. Complete the following steps.
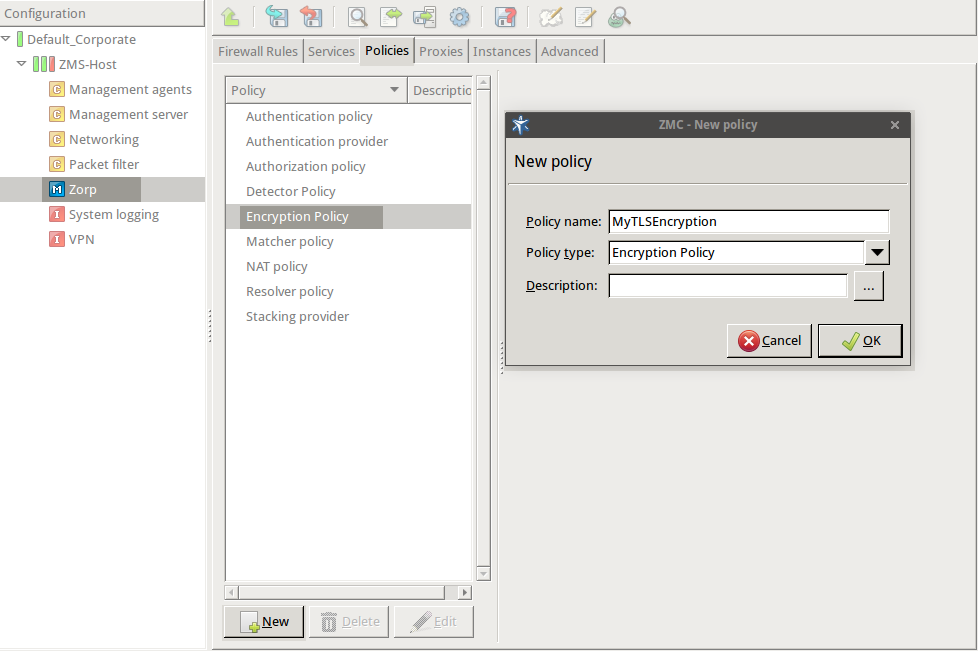
Navigate to the MC component of the firewall host.
Select .
Enter a name into the field, for example,
MyTLSEncryption.Select , then click OK.
Select .
Python:
EncryptionPolicy( name="MyTLSEncryption", encryption=TwoSidedEncryption() )Double-click , then select .
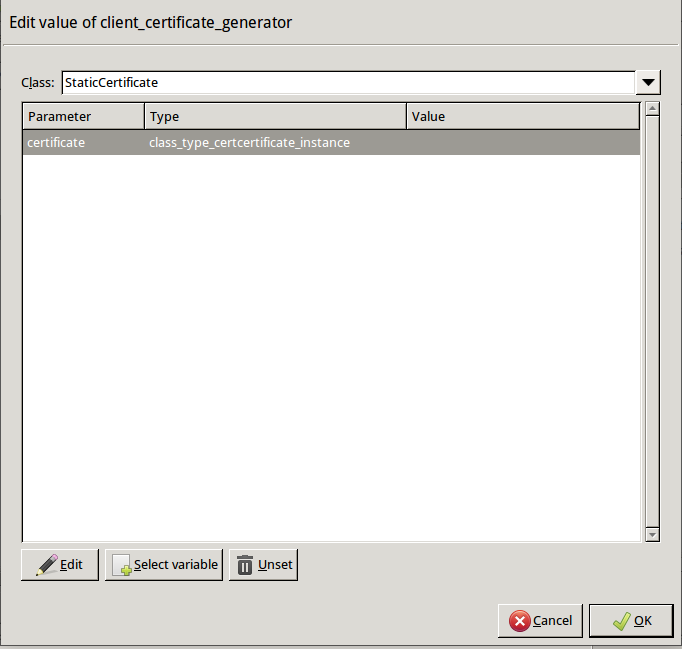
Double-click , then double-click . A window displaying the certificates owned by the host will be displayed. The lower section of the window shows the information contained in the certificate. Select the certificate that you want Application-level Gateway to show to the clients (for example, the certificate created in Step 1), then click .
Python:
    encryption=TwoSidedEncryption(
        client_certificate_generator=StaticCertificate(
            certificate=Certificate.fromFile(
                certificate_file_path="/etc/key.d/MS_Engine/cert.pem",
                private_key=PrivateKey.fromFile(
                    "/etc/key.d/MS_Engine/key.pem")
            )
        )
    )
If the private key of the certificate is password-protected, double-click , type the password, then click OK. Otherwise, click OK.
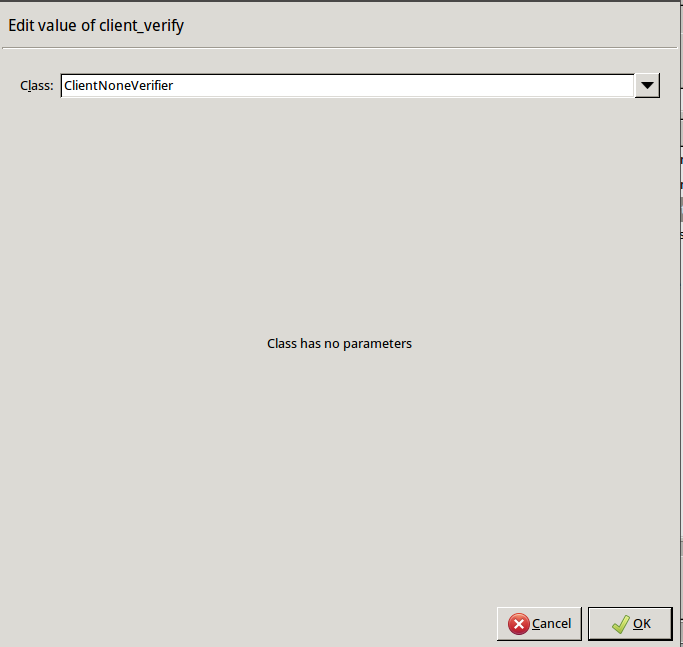
Disable mutual authentication. That way, Application-level Gateway will not request a certificate from the clients.
Double-click , select , then click OK.
Python:
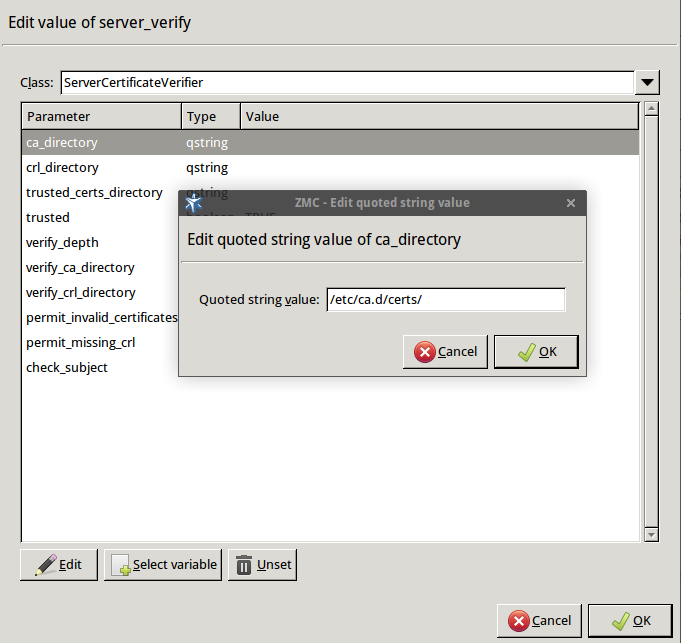
    encryption=TwoSidedEncryption(
        client_verify=None
    )
Specify the directory containing the certificates of the trusted CAs. These settings determine which servers can the clients access: the clients will be able to connect only those servers via SSL/TLS which have certificate signed by one of these CAs (or a lower level CA in the CA chain).
Double-click , double-click , then type the path and name to the directory that stores the trusted CA certificates, for example,
/etc/ca.d/certs/. Click OK.Python:
    encryption=TwoSidedEncryption(
        server_verify=ServerCertificateVerifier(
            ca_directory="/etc/ca.d/certs/"
        )
    )
Note CAs cannot be referenced directly, only the trusted group containing them. For details on managing trusted groups, see Section 11.3.7.3, Managing trusted groups in Proxedo Network Security Suite 1.0 Administrator Guide.
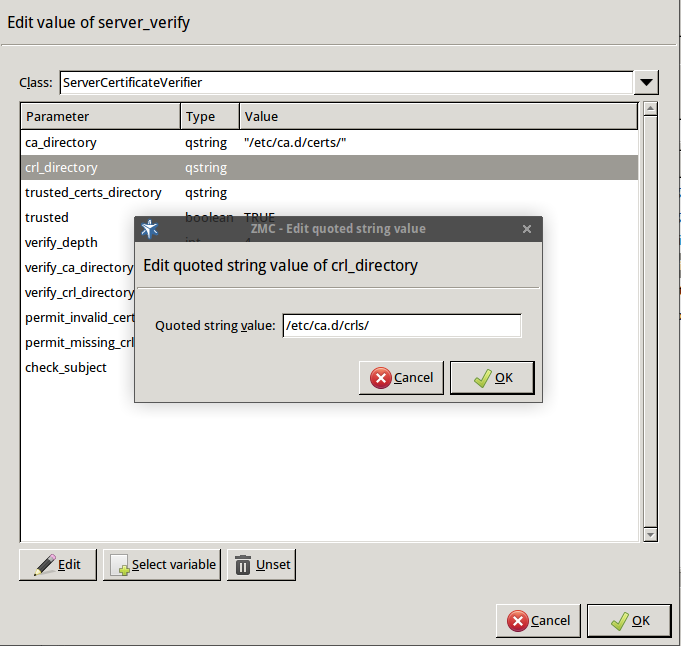
Specify the directory containing the CRLs of the trusted CAs.
Double-click , then type the path and name to the directory that stores the CRLs of the trusted CA certificates, for example,
/etc/ca.d/crls/. Click OK.Python:
    encryption=TwoSidedEncryption(
        server_verify=ServerCertificateVerifier(
            ca_directory="/etc/ca.d/certs/",
            crl_directory="/etc/ca.d/crls/"
        )
    )
Optional Step: The Common Name in the certificate of a server or webpage is usually its domain name or URL. By default, Application-level Gateway compares this Common Name to the actual domain name it receives from the server, and rejects the connection if they do not match. That way it is possible to detect several types of false certificates and prevent a number of phishing attacks. If this mode of operation interferes with your environment, and you cannot use certificates that have proper Common Names, disable this option.
Double-click , select
FALSE, then click OK.Python:
    encryption=TwoSidedEncryption(
        server_verify=ServerCertificateVerifier(
            ca_directory="/etc/ca.d/certs/",
            crl_directory="/etc/ca.d/crls/",
            check_subject=FALSE
        )
    )
Optional Step: Forbid the use of weak encryption algorithms to increase security. The related parameters can be set separately for the client and the server-side of Application-level Gateway, using the and parameters of the Encryption Policy. Disabling weak algorithms also eliminates the risk of downgrade attacks, where the attacker modifies the SSL session-initiation messages to force using weak encryption that can be easily decrypted by a third party.
Note Certain outdated operating systems, or old browser applications do not properly support strong encryption algorithms. If your clients use such systems or applications, you might have to permit weak encryption algorithms.
Double-click , click , click
 , select
 const_ssl_method_tls1_1orconst_ssl_method_tlsv1_2, then click OK.Repeat this step for the parameter.
SSL methods may occasionally fall back to older (thus weaker) protocol versions if one of the peers does not support the newer version. To avoid this situation, explicitly disable undesired protocol versions (SSLv2 and SSLv3 are disabled by default).
For example, to disable TLSv1, double-click , click
TRUE, then click OK. Repeat this step for the parameter.
Python:
    encryption=TwoSidedEncryption(
        server_ssl_options=ServerSSLOptions(
            method=SSL_METHOD_TLSV1_2, disable_proto_tlsv1=TRUE)
        client_ssl_options=ClientSSLOptions(
            method=SSL_METHOD_TLSV1_2, disable_proto_tlsv1=TRUE)
        )
Optional Step: Enable untrusted certificates. Since a significant number of servers use self-signed certificates (with unverifiable trustworthiness), in certain situations you might need to permit access to servers that have untrusted certificates.
Double-click , click
FALSE, then click OK.Python:
    encryption=TwoSidedEncryption(
        server_verify=ServerCertificateVerifier(
            trusted=FALSE
        )
    )
Python:
The Encryption Policy configured in the previous steps is summarized in the following code snippet.
EncryptionPolicy(
    name="MyTLSEncryption",
    encryption=TwoSidedEncryption(
        client_verify=None,
        server_verify=ServerCertificateVerifier(
            ca_directory="/etc/ca.d/certs/",
            crl_directory="/etc/ca.d/crls/",
            check_subject=FALSE
            ),
        client_ssl_options=ServerSSLOptions(
            method=SSL_METHOD_TLSV1_2, disable_proto_tlsv1=TRUE),
        server_ssl_options=ServerSSLOptions(
            method=SSL_METHOD_TLSV1_2, disable_proto_tlsv1=TRUE),
        client_certificate_generator=StaticCertificate(
            certificate=Certificate.fromFile(
                certificate_file_path="/etc/key.d/MS_Engine/cert.pem",
                private_key=PrivateKey.fromFile(
                    "/etc/key.d/MS_Engine/key.pem")
            ))
        ))
Select .
Note when managing PNS without MC, you must copy the certificates and CRLs to their respective directories. They are not updated automatically as in configurations managed by MC.
By performing the above steps, you have configured the proxy to use the specified certificate and its private key, and also set the directory that will store the certificates of the trusted CAs and their CRLs. Client authentication has also been disabled.
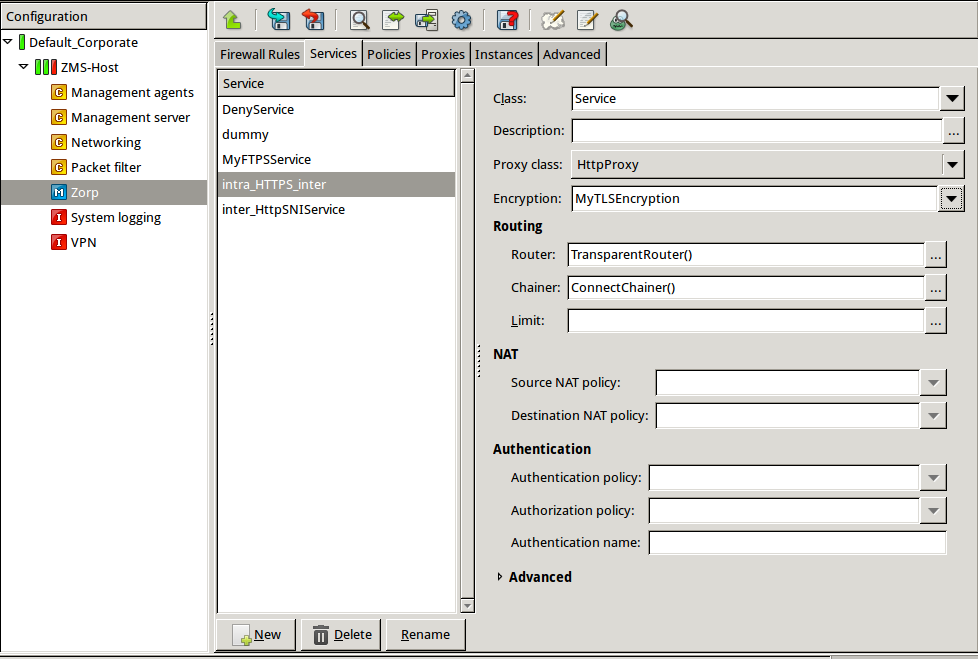
Create a service that clients can use to access the Internet in a secure channel. This service will use the
MyTLSEncryptionEncryption Policy.Select , enter a name for the service (for example,
intra_HTTPS_inter), then click OK.Select .
Select .
Configure the other parameters of the service as needed for your environment, then click .
Select , and select the service created in the previous step. For more details on creating firewall rules, see Section 6.5, Configuring firewall rules in Proxedo Network Security Suite 1.0 Administrator Guide.
Configure the other parameters of the rule as needed for your environment, then click .
Python:
def demo() :
    Service(
        name='demo/intra_HTTPS_inter',
        router=TransparentRouter(),
        chainer=ConnectChainer(),
        proxy_class=HttpProxy,
        max_instances=0,
        max_sessions=0,
        keepalive=Z_KEEPALIVE_NONE,
        encryption_policy="MyTLSEncryption"
    )

    Rule(
        rule_id=300,
        src_subnet=('192.168.1.1/32', ),
        dst_zone=('internet', ),
        proto=6,
        service='demo/intra_HTTPS_inter'
    )
Commit and upload your changes, then restart Application-level Gateway.
Expected result:
Every time a client connects to a server, Application-level Gateway checks the certificate of the server. If the signer CA is trusted, Application-level Gateway shows a trusted certificate to the client (browser or other application). If the certificate of the server is untrusted, Application-level Gateway shows an untrusted certificate to the client, giving a warning to the user. The user can then decide whether the certificate can be accepted or not.

Published on June 04, 2020
© 2007-2019 BalaSys
Send your comments to support@balasys.hu
