Copyright © 1996-2020 BalaSys IT Ltd.
June 04, 2020
Abstract
This tutorial describes how to correctly configure PNS firewalls to perform virus filtering in HTTP
Table of Contents
This tutorial provides guidelines for PNS administrators on enabling virus filtering in HTTP traffic. Knowledge in TCP/IP and PNS administration is required to fully comprehend the contents of this paper. The procedures and concepts described here are applicable to version 1.0 of PNS. Detailed information is provided to configure PNS both from Management Console and using Python scripts.
The tutorial discusses the application of the Content Filtering system and the Nod32 module, but the concept is similarly applicable to other content or virus filtering modules of CF. Detailed information is provided to configure PNS both from Management Console and using Python scripts.
This tutorial helps you to configure Application-level Gateway to analyze HTTP(S) traffic in various scenarios. For filtering viruses in HTTP traffic with PNS, you must configure an HttpProxy proxy and a CF module. Generally, the settings of the virus filter do not affect the HTTP traffic: the Application-level Gateway HTTP proxy checks the HTTP protocol and then passes the data part to the CF stacking provider, and has no knowledge about what CF will do with the data.
Note that explaining the concepts of the different aspects of SSL/TLS and HTTP proxying is beyond the scope of this tutorial. For background information, see the following documents:
For details on deriving and modifying proxies, see Section 6.6, Proxy classes in Proxedo Network Security Suite 1.0 Administrator Guide.
For details on configuring CF, see Chapter 14, Virus and content filtering using CF in Proxedo Network Security Suite 1.0 Administrator Guide.
For details on configuring PNS proxies to handle SSL/TLS connections, see How to configure SSL proxying in PNS 1.0.
For an overview on certificates and related topics in connection with PNS, see Chapter 11, Key and certificate management in PNS in Proxedo Network Security Suite 1.0 Administrator Guide.
For details on the available attributes of the PNS HTTP proxy that you can adjust and modify to best suit your needs, see Section 4.7, Module Http in Proxedo Network Security Suite 1.0 Reference Guide
You can download the above documents at the Documentation Page.
Application-level Gateway can be fully configured using either the graphical Management Console (MC) or manually by editing plain text Python configuration files. The suggestions and background information provided in this tutorial are equally applicable to both methods. Step-by-step explanation with screenshots is given for MC-based configuration, while sample Python code lines can be found at the end of each step. After replacing the sample parameters (for example, IP addresses) with proper ones for your actual configuration, add these lines to the policy file of Application-level Gateway (usually found under /etc/zorp/policy.py). Also pay attention to the proper indentation of Python code lines. For more details, see Chapter 10, Local firewall administration in Proxedo Network Security Suite 1.0 Administrator Guide.
For configuring CF without using MC, sample configuration files are provided. You must copy these into the /etc/zcv/zcv.cfg file on the CF host.
If you are using the Management Console and you want to display the Python code generated by MC, select a host, then select from the main menu.
3. Procedure – Configuring CF
Purpose:
To filter HTTP traffic for viruses in PNS, first CF has to be configured. The following configuration will use mostly default options, but it will enable the trickling option (by default, trickling is disabled). A size limit for the files to be inspected will also be set, that is, an action will be set for files that are considered too large and will not be inspected for viruses. Complete the following steps.
The configurations, including the default configuration options can be set without using MC by editing the configuration files of CF. The exact configurations are shown at the end of this tutorial.
Steps:
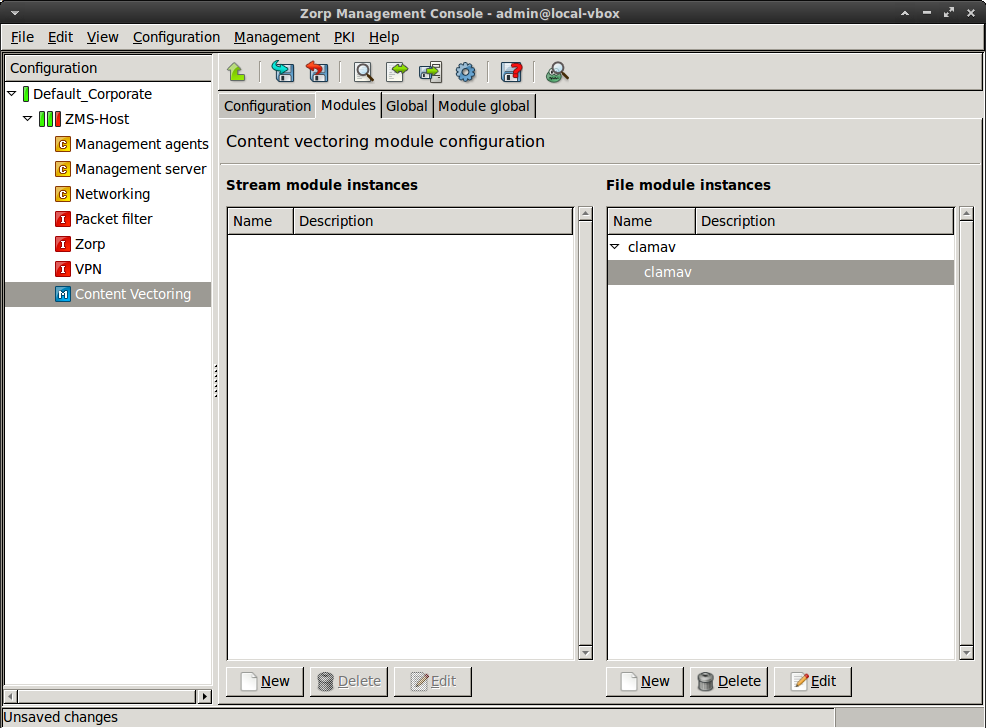
If you have not already done, add the component to the host that will be used for content vectoring. For details, see Procedure 3.2.1.3.1, Adding new configuration components to host in Proxedo Network Security Suite 1.0 Administrator Guide.
-
Create a new module instance of a virus-filtering module.
Select .
Enter a name for the instance.
Select the virus-filtering module (for example,
clamav) you want to use to scan the traffic in the field.Click .
-
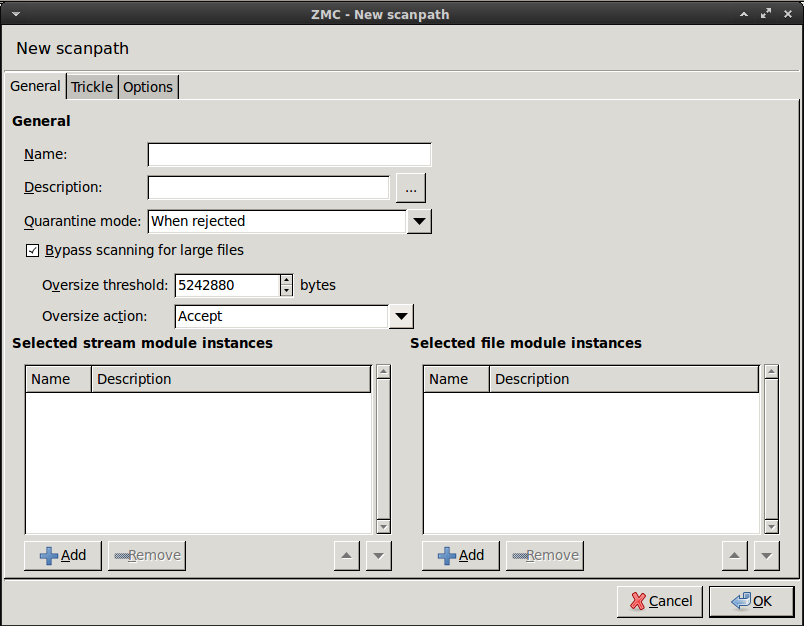
Configure a new scanpath.
Select , and enter a name for the new scanpath (for example,
http).Select the .
Set the option to
Accept.-
Optional Step: Adjust the option.
The size of the largest object to scan is specified in bytes in the parameter (the default value is
10485760, that is, 10MB). It might be useful to set it to a lower value: remaining by the above bandwidth example, downloading a 10MB file takes ~5 minutes. However, from a security point of view, there is only slight difference between filtering files up to 10MB, 5MB or 2MB. The vast majority of viruses spreads in files under 1MB. Naturally, if the threshold is higher, less data is allowed to pass without scanning, but viruses and other malicious contents are typically only 50-200KB. If the size limit is only 2 MB, large files are trickled only for ~1 minute, so the user has to wait much less. Set to either 2097152 (2MB) or 5242880 (5MB).
Select , and select the module created in Step Step 2 (for example,
clamav), then click .Select the option to enable trickling, then click .
-
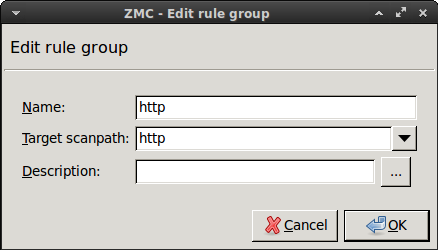
Select , and enter a name for the new rulegroup (for example,
http).
Select the scanpath created in Step Step 3 in the field.
-
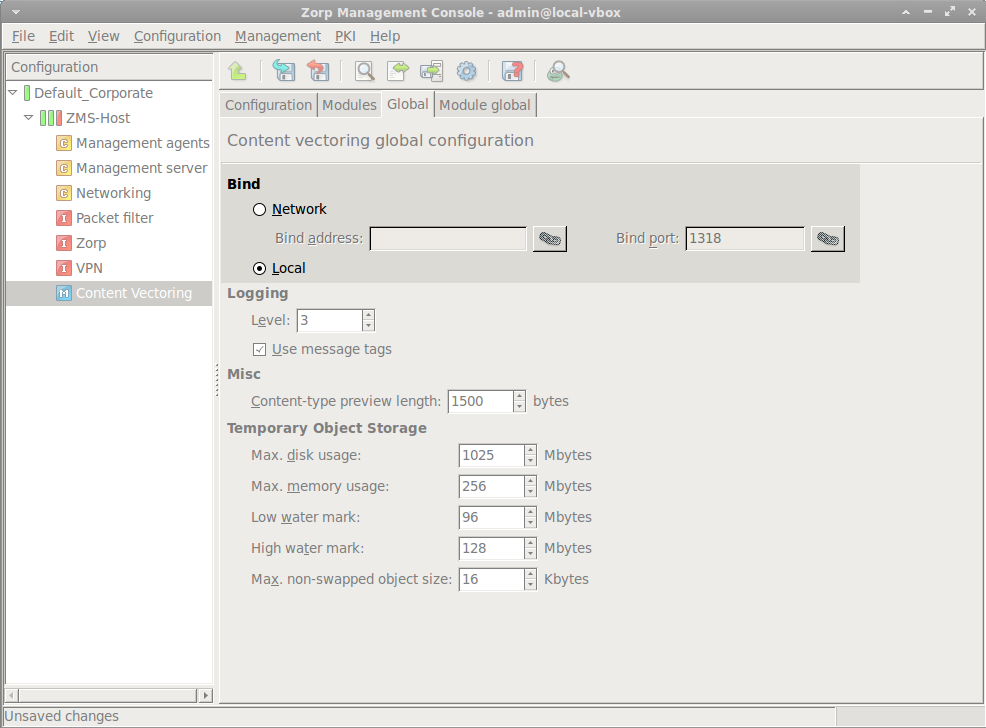
Select the tab, and configure how CF accepts connections from PNS.
If Application-level Gateway and CF are running on the same host, select the option.
Otherwise specify the IP address where CF should bind to.
4. Procedure – Making CF available for Application-level Gateway services
Purpose:
To use CF from Application-level Gateway services, a stacking provider policy must be created. Complete the following steps.
Steps:
-
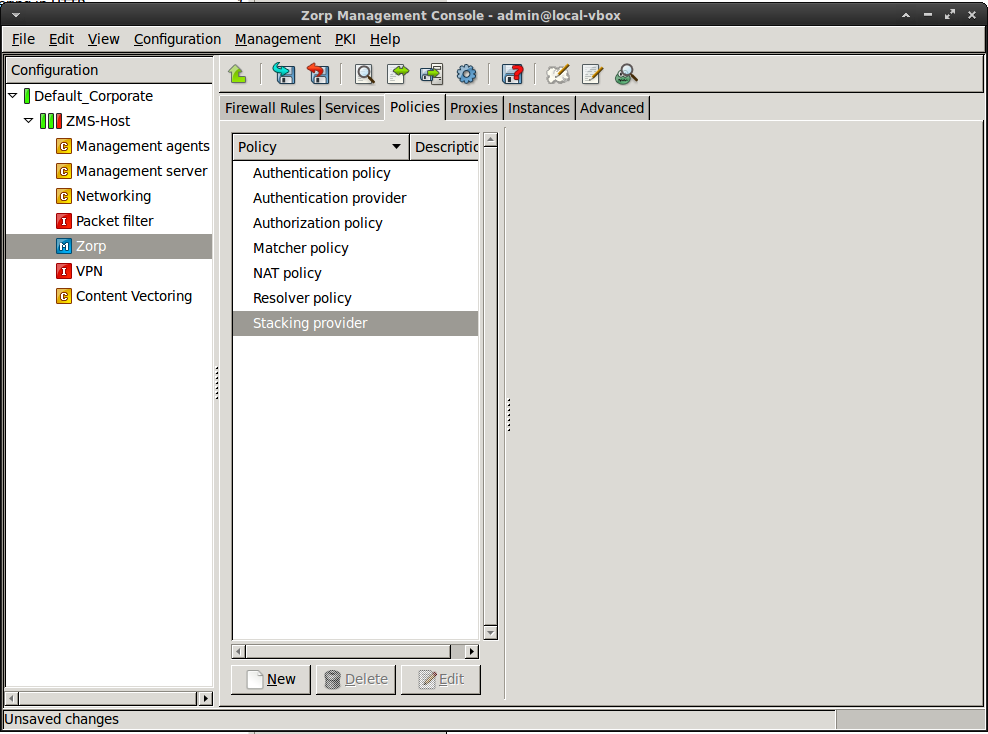
Select the MC component, then select .
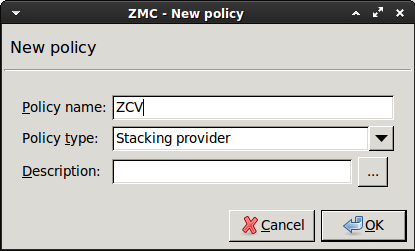
-
Enter a name for the policy (for example,
CF) and set the option toStacking provider.
-
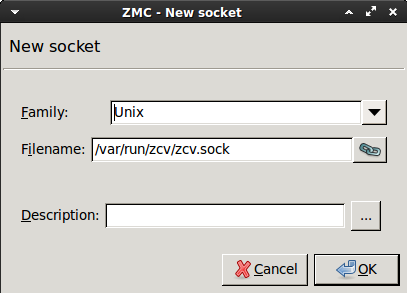
In the pane, select , and set how Application-level Gateway can communicate with CF.
If Application-level Gateway and CF are running on the same host, select , then click .
Otherwise specify the IP address of the CF host.
Python:
StackingProvider(name="CF", backend=RemoteStackingBackend(addrs=(SockAddrUnix('/var/run/zcv/zcv.sock'),)))
5. Procedure – Enabling virus filtering in HTTP
Purpose:
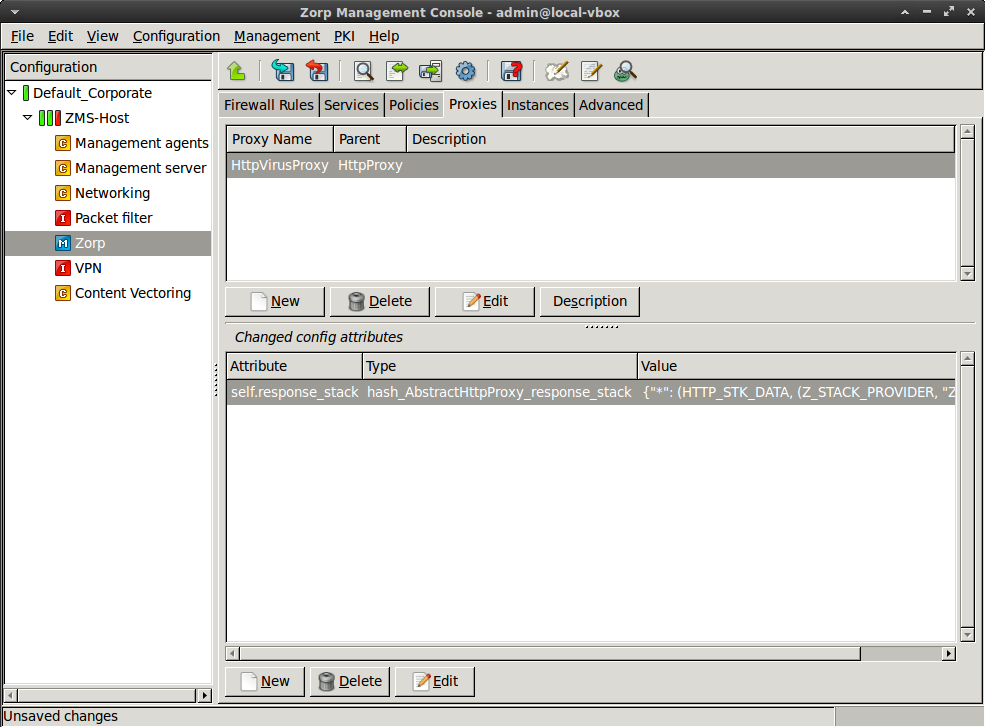
To configure virus filtering in the HTTP traffic with common parameter values, create an HttpProxy class which stacks CF to inspect the downloaded data. Complete the following steps.
These settings instruct the new HttpProxy to pass all responses (downloaded data) to the specified stacking provider — that is, to CF to scan everything downloaded via HTTP for viruses. Application-level Gateway will stack the stacking provider for every response (response_stack) that will scan the data part of the message for viruses.
Steps:
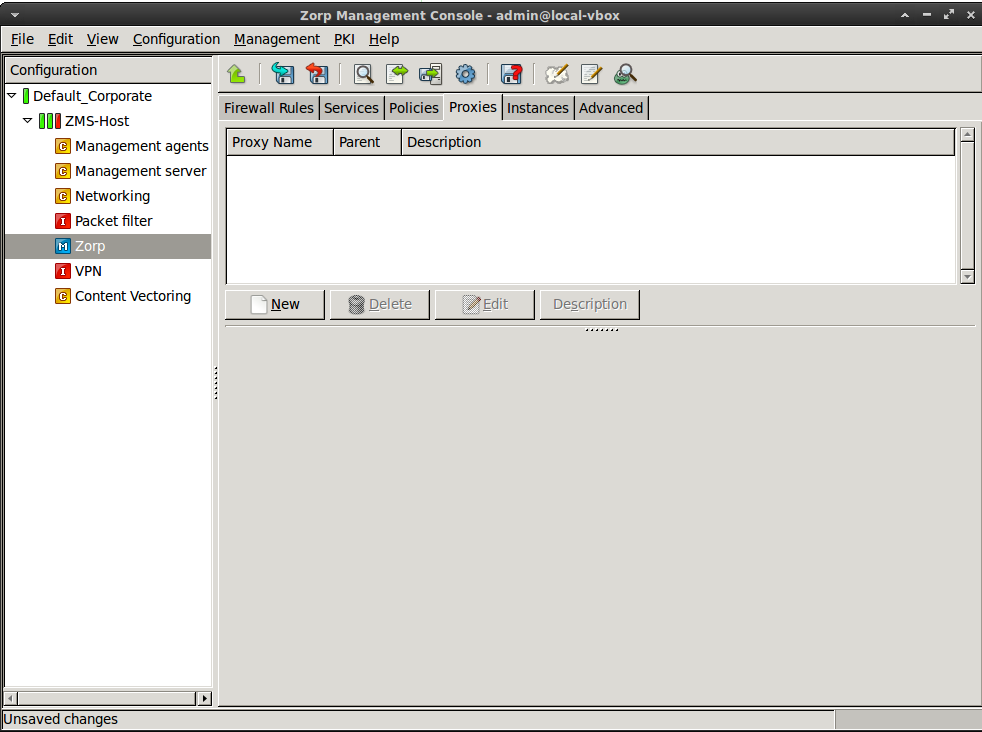
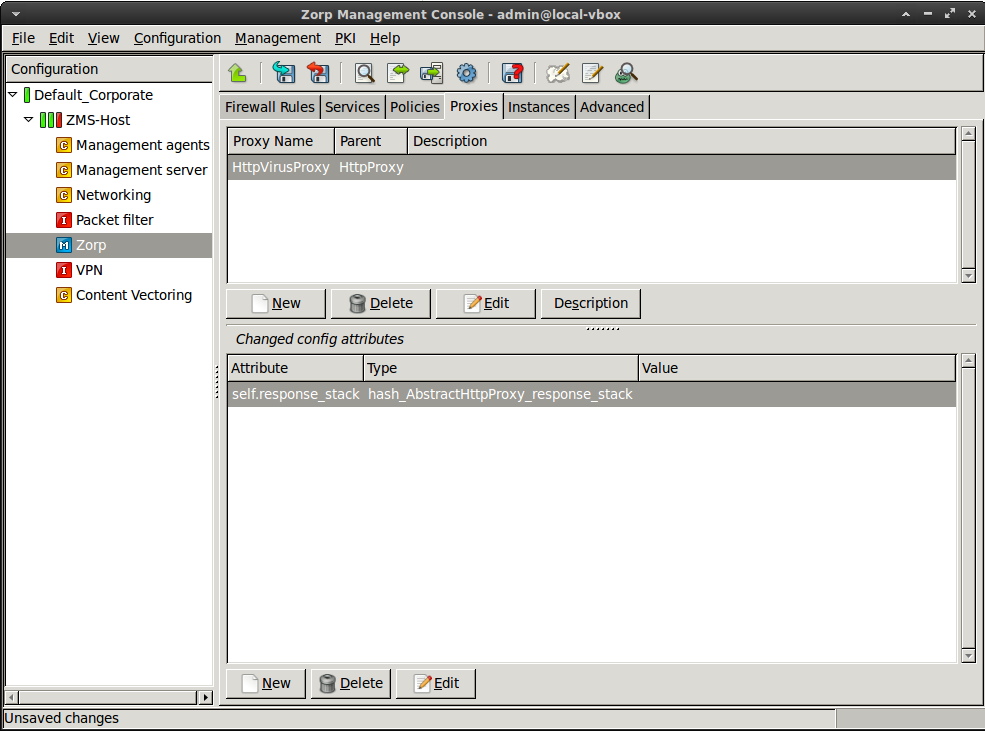
Navigate to the MC component of the firewall host.
-
Select the tab, then click .
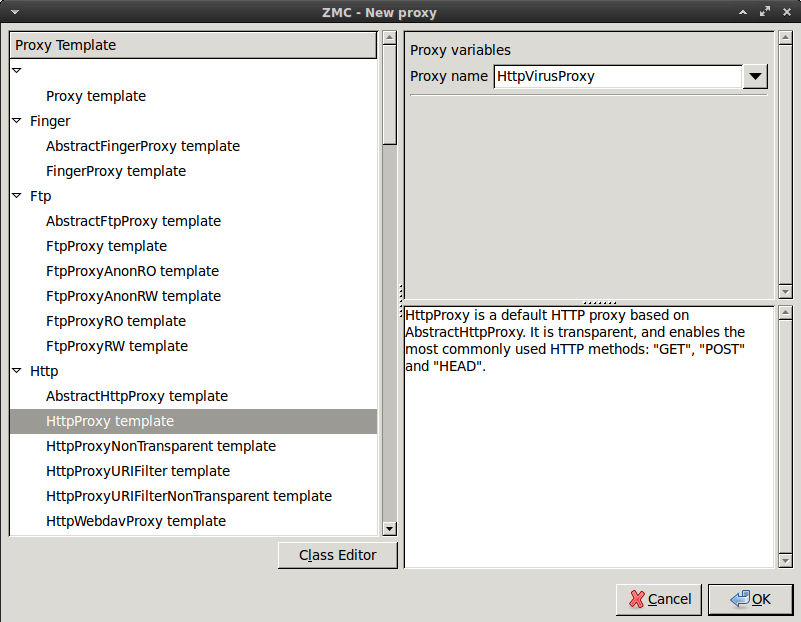
-
Select the template from the left panel, and enter a name for the new class. Name this class
HttpVirusProxyand click .
-
Add the
self.response_stackattribute to the panel.
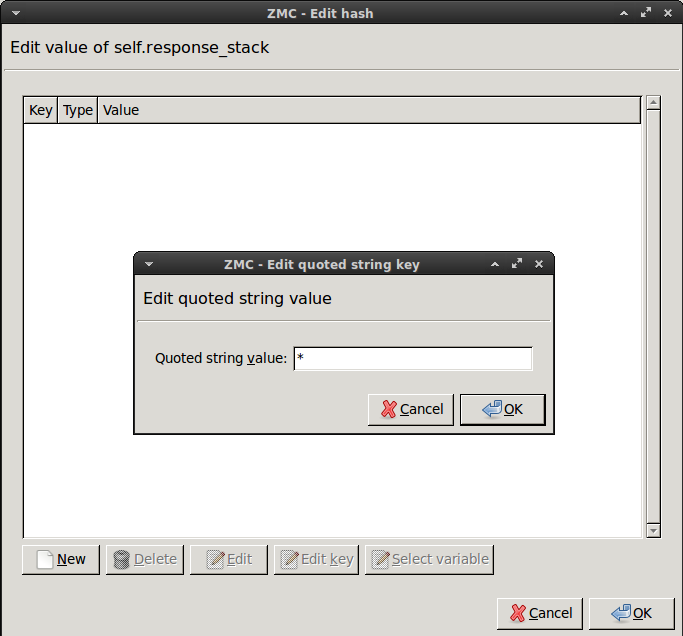
Select this new attribute, then click .
Enter the
*(asterisk) character, then click .-
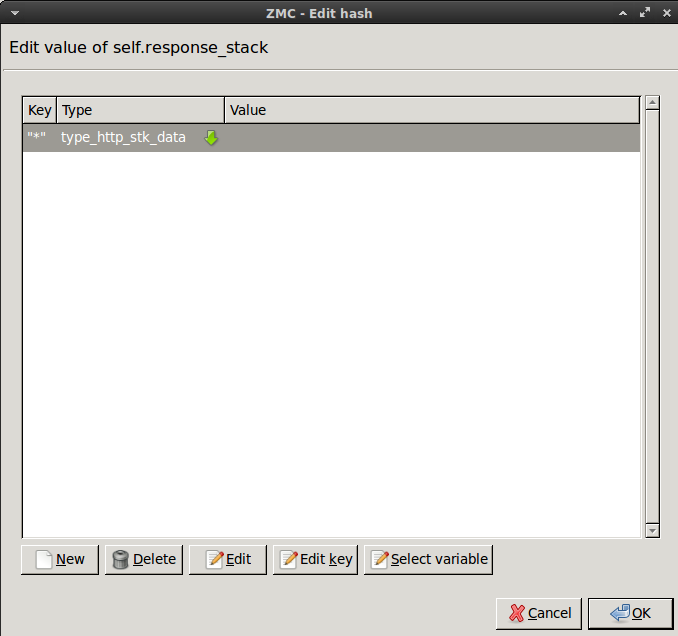
Click on the text in the field, then select
type_http_stk_data.
-
Click , then select the second row of the appearing panel (the one having
zorp_stackin its field). Click .
-
Configure the proxy to send the incoming data to CF.
Select .
In the field, select the stacking provider policy (for example,
zcv) created in Procedure 4, Making CF available for Application-level Gateway services.In the field, select the rulegroup (for example,
http) created in Procedure 4, Making CF available for Application-level Gateway services.Click .
Python: Create an HttpProxy class which stacks CF to inspect the downloaded data.
class HttpVirusProxy(HttpProxy): def config(self): HttpProxy.config(self) self.response_stack["*"]=(HTTP_STK_DATA, (Z_STACK_PROVIDER, "CF", "http")) -
Create a service that clients can use to access the Internet.
Select , and enter a name for the service (for example,
intra_HTTP_inter).Select .
Configure the other parameters of the service as needed for your environment, then click .
Select , and select the service created in the previous step.
Configure the other parameters of the rule as needed for your environment, then click .
Python: Create an HttpProxy class which stacks CF to inspect the downloaded data.
def demo_instance() :
    Service(name='demo_instance/intra_http_inter', router=TransparentRouter(), chainer=ConnectChainer(), proxy_class=HttpVirusProxy, max_instances=0, max_sessions=0, keepalive=Z_KEEPALIVE_NONE)

    Rule(rule_id=1,
    src_zone=('*', ),
    dst_zone=('internet', ),
    proto=6,
    service='demo_instance/intra_http_inter'
    )
Commit and upload your changes, then restart Application-level Gateway.
6. Procedure – Enabling virus filtering for uploads
Purpose:
In case your security policies require it, you can enable virus filtering for files that your users upload to external servers. This is also required when protecting a server to which files can be uploaded from outside. To achieve this, you have to modify the HttpVirusProxy created in Procedure 5, Enabling virus filtering in HTTP. Complete the following steps.
| Note |
|---|
|
If enabled in CF, then trickling is performed in this case as well, but this time towards the server in order to avoid server-side time outs. The HTTP proxy will pass not only the data, but the HTTP headers as well to the stacking provider, so it can use them for the MIME decapsulation. The virus-filtering modules are is able to decode MIME encoded content. |
Steps:
-
Select , then select the
HttpVirusProxyproxy class.
Add the
self.request_stackattribute to the panel.Select this new attribute, then click .
Enter the
*(asterisk) character, then click .Click on the text in the field, then select
type_http_stk_mime. (When uploading files via HTTP, the files have to be sent MIME-encoded, while this is not required for downloading. MIME encoding is important only when uploading multiple files. The headers are needed for the MIME decapsulation.)-
Click , then select the second row of the appearing panel (the one having
zorp_stackin its field). Click .
-
Configure the proxy to send the incoming data to CF.
Select .
In the field, select the stacking provider policy (for example,
zcv) created in Procedure 4, Making CF available for Application-level Gateway services.In the field, select the rulegroup (for example,
http) created in Procedure 4, Making CF available for Application-level Gateway services.Click .
Python: Modify the HttpProxy class which stacks CF to inspect the uploaded data.
self.request_stack["*"]=(HTTP_STK_MIME, (Z_STACK_PROVIDER, "CF", "http")) -
Optional Step: Note that with the configuration set in the previous steps, every HTTP response and request is scanned for viruses, if it contains data. (For example, according to the RFC, HEAD responses and GET requests do not have data parts.) To filter only the POST requests, complete the following steps.
On the tab, select
HttpVirusProxy, then select , and click .-
Select the
*key, then click . TypePOST, then click .Python:
self.request_stack["POST"]=(HTTP_STK_MIME, (Z_STACK_PROVIDER, "CF", "http"))
-
Optional Step: It is even possible to specify different proxy classes for the different request/response types. To accomplish this, you will need to add two values to the
self.response_stackattribute. The first one will specify which virus filtering proxy to use for POST responses, the second one for GET responses. That way it is possible to use different scanpaths or different virus-filtering modules for the different response types. For example, you can examine the downloaded data with a rulegroup that uses the clamav and nod32 engines, but use only one module to examine the uploaded data. To accomplish this, complete the following steps.Navigate to the MC module, and create a new scanpath and a new rulegroup that will be used to examine HTTP GET requests (for example, name this rulegroup
http_get).Navigate to the MC module, select , then click .
Select the key, then click . Select the row containing , then click .
-
Select the rulegroup you want to use to filter POST requests (for example, ).
Python:
self.request_stack["POST"]=(HTTP_STK_MIME, (Z_STACK_PROVIDER, "CF", "http")) Add a new key to the attribute. Enter
GETas the key value.-
Click on the text in the field, then select
type_http_stk_data. Select the rulegroup you want to use to filter GET requests (for example, ).Python:
self.response_stack["GET"]=(HTTP_STK_DATA, (Z_STACK_PROVIDER, "CF", "http_get"))
7. Procedure – Disabling HTTP byteranges and download managers
Purpose:
Downloading byteranges (used also by download managers) can confuse antivirus applications, or often make it impossible to perform virus filtering on the downloaded file. Therefore, you might want to forbid the use of byteranges. Disabling byteranges has the following effects:
Virus filtering becomes possible in the downloaded data.
Download managers will not work. (The security policy of many organizations forbids using download managers anyway.)
The clients cannot resume incomplete downloads.
To disable byteranges, you have to configure your HTTP proxy (for example, HttpVirusProxy) to forbid the use of certain HTTP headers. Complete the following steps.
Steps:
Select , then select the
HttpVirusProxyproxy class.Add the
self.response_headerattribute to the panel.Select this new attribute, then click .
Enter
Accept-Ranges, then click .-
The server sends the
Accept-Ranges: bytesHTTP header to inform the client about the type of range requests it accepts (RFC 2616 14.5). If the server does not support range requests, it sends the following header to explicitly deny the use of byte-ranges:Accept-Ranges: none.-
To delete every
Accept-Rangesheader from the HTTP traffic, click on the text in the field, then selectconst_http_hdr_drop.Python:
self.response_header["Accept-Ranges"] = (HTTP_HDR_DROP)
Note The client can send byterange requests to the server, because the absence of the header does not mean that the server does not support downloading byteranges.
-
To explicitly state that the server does not support byteranges, click on the text in the field, then select
type_http_hdr_replace. Click , then enterNONE.Python:
self.response_header["Accept-Ranges"] = (HTTP_HDR_REPLACE, "NONE")
Note That still does not mean that the client cannot send byterange requests.
-
To ensure that the clients cannot use byteranges, you can delete the
Rangeheader from the client requests, or even reject the entre request.-
To delete only the
Rangeheader and leave the rest of the request unchanged, add theRangekey to the attribute, it to typeconst_http_hdr_drop.Python:
self.request_header["Range"] = (HTTP_HDR_DROP)
-
To reject the entire request, add the
Rangekey to the attribute, it to typeconst_http_hdr_abort.Python:
self.request_header["Range"] = (HTTP_HDR_ABORT)
-
-
8. Procedure – Disabling delta encoding
Purpose:
Delta encoding (RFC 3229) is used for updating a previously downloaded file. It enables to download only those parts of the file that were modified. This technique is also problematic, because the complete file is not available for the virus filter. Similarly to byteranges, this can also be disabled.
The client sends an A-IM header to the server if it can accept delta-encoded responses. To disable delta encoding, it is sufficient to remove these headers from the client requests.Complete the following steps.
Steps:
Select , then select the
HttpVirusProxyproxy class.Add the
self.request_headerattribute to the panel.Select this new attribute, then click .
Enter
A-IM, then click .-
Click on the text in the field, then select
const_http_hdr_drop.Python:
self.request_header["A-IM"] = (HTTP_HDR_DROP)
When configured according to this tutorial, the related configuration files of Application-level Gateway and CF should look something like this:
zcv.cfg.
<!--
 This file is generated by the Management System. Do not edit!
-->
<configuration name="zcv">
  <section name="router">
    <router>/etc/zcv/router.cfg</router>
  </section>
  <section name="misc">
    <tempdir>/var/lib/zorp/tmp</tempdir>
    <magic_length>1500</magic_length>
  </section>
  <section name="bind">
    <unix>/var/run/zcv/zcv.sock</unix>
    <ip/>
    <port>1318</port>
  </section>
  <section name="log">
    <loglevel>3</loglevel>
    <logtags>1</logtags>
  </section>
  <section name="blob">
    <max_disk_usage>1074790400</max_disk_usage>
    <max_mem_usage>268435456</max_mem_usage>
    <lowat>100663296</lowat>
    <hiwat>134217728</hiwat>
    <noswap_max>16384</noswap_max>
  </section>
</configuration>
<configuration name="scanpaths">
  <section name="http">
    <plugins>clamav:clamav</plugins>
    <quarantine_mode>rejected</quarantine_mode>
    <threshold_oversize>10485760</threshold_oversize>
    <oversize_action>accept</oversize_action>
    <trickle_mode>percent</trickle_mode>
    <trickle_percent>10</trickle_percent>
    <magic_force>0</magic_force>
    <gzip_detect>1</gzip_detect>
    <gzip_level>4</gzip_level>
    <gzip_strip>extra</gzip_strip>
    <accept_corrupted_file>0</accept_corrupted_file>
    <accept_encrypted_file>0</accept_encrypted_file>
    <accept_unknown_packed_file>0</accept_unknown_packed_file>
    <accept_file_with_warning>0</accept_file_with_warning>
    <accept_on_os_error>0</accept_on_os_error>
    <accept_on_engine_error>0</accept_on_engine_error>
    <accept_on_license_error>0</accept_on_license_error>
  </section>
</configuration>
<configuration name="module-options">
  <section name="vbuster">
    <archive_max_size>10</archive_max_size>
    <archive_max_ratio>100</archive_max_ratio>
    <vdb_error_soft_fail>0</vdb_error_soft_fail>
  </section>
  <section name="nod32">
    <archive_max_size>10</archive_max_size>
    <daemon_timeout>60</daemon_timeout>
    <daemon_socket>/var/run/nod32/nod32d.sock</daemon_socket>
    <temp_directory>/tmp</temp_directory>
  </section>
</configuration>
<configuration name="clamav">
  <section name="clamav">
    <mode>file</mode>
    <scan_packed>1</scan_packed>
  </section>
</configuration>
router.cfg.
#
# This file is generated by the Management System. Do not edit!
#
zcv_rule_group="http" http
policy.py.
class HttpVirusProxy(HttpProxy):
    def config(self):
        HttpProxy.config(self)
        self.response_stack["GET"]=(HTTP_STK_DATA, (Z_STACK_PROVIDER, "CF", "http_get"))
        self.response_stack["POST"]=(HTTP_STK_DATA, (Z_STACK_PROVIDER, "CF", "http"))
        self.request_stack["POST"]=(HTTP_STK_MIME, (Z_STACK_PROVIDER, "CF", "http"))
        self.response_header["Accept-Ranges"]=(HTTP_HDR_REPLACE, "NONE")
        self.response_header["A-IM"]=HTTP_HDR_DROP
        self.request_header["Range"]=HTTP_HDR_ABORT
def demo_instance() :
    Service(name='demo_instance/intra_http_inter', router=TransparentRouter(), chainer=ConnectChainer(), proxy_class=HttpVirusProxy, max_instances=0, max_sessions=0, keepalive=Z_KEEPALIVE_NONE)

    Rule(rule_id=1,
    src_zone=('*', ),
    dst_zone=('internet', ),
    proto=6,
    service='demo_instance/intra_http_inter'
    )
This tutorial has shown how to configure PNS to perform virus filtering in the HTTP traffic, including simple virus filtering with trickling, enabling filtering uploads, and disabling the use of download managers. Although these examples are relatively simple, they provide a solid base from which more complex configurations can be built — just as the security policy of your organization requires it. [1]
[1] All questions, comments or inquiries should be directed to <info@balasys.hu> or by post to the following address: BalaSys IT Ltd. 1117 Budapest, Alíz Str. 4 Phone: +36 1 646 4740 Web: https://www.balasys.hu/
Copyright © 2020 BalaSys IT Ltd. All rights reserved.
The latest version is always available at the Balasys Documentation Page.